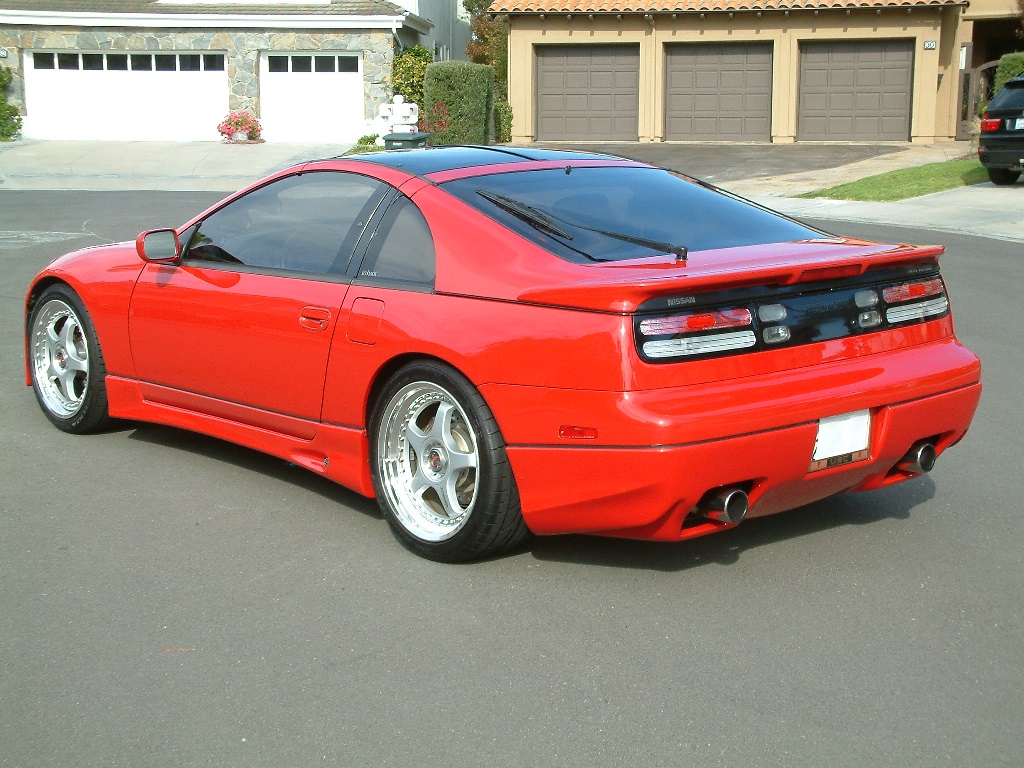
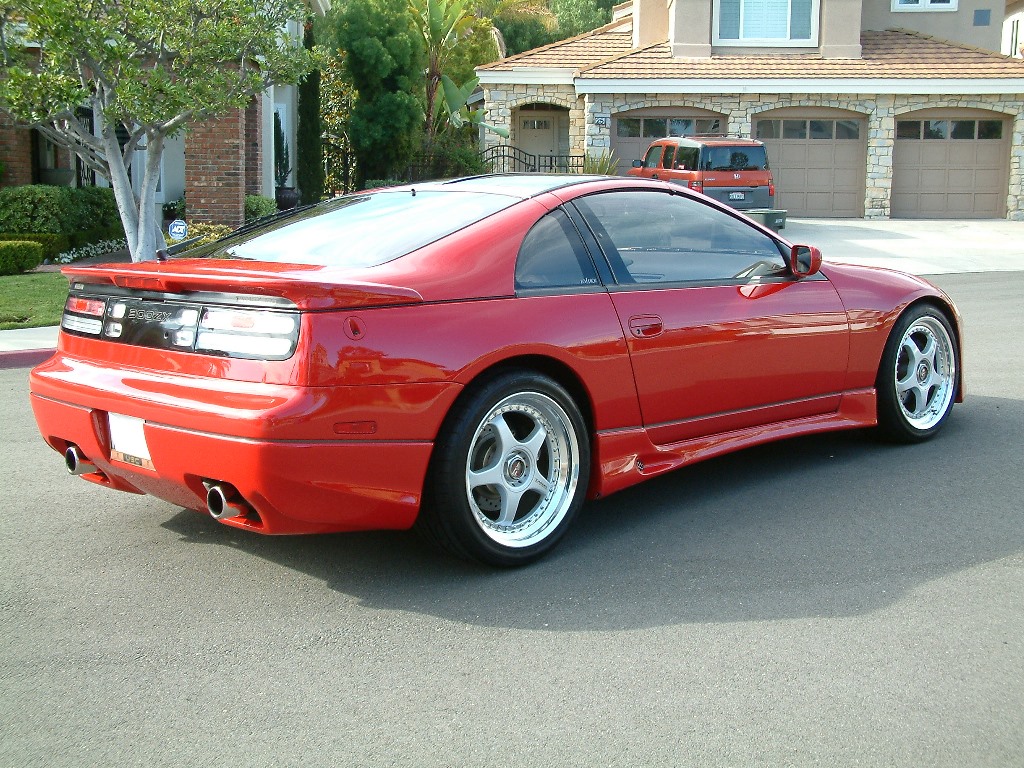
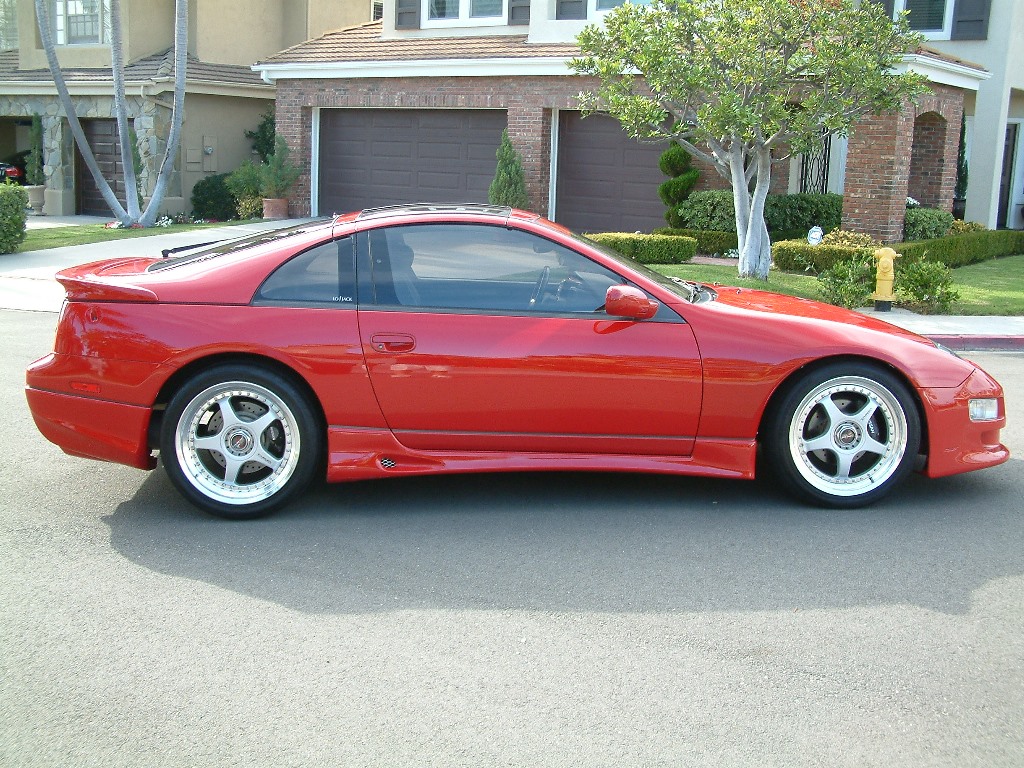
Ron is the original owner of this beautiful Z and now it is for sale. The Z was the original West Wings advertising car you may have seen it in old issues of Sport Compact Car and the likes of the late 90s and early 2000s. Ron has been a customer of ours since the really late 90s and in 2012 we completed an extensive upgrade\refresh to the Z. The following major parts were installed by us:
It didn’t take long after we originally tuned Sam’s 2012 Black Edition GTR on 91 octane and E85 that we upgraded turbos. An oil leak on the passenger side turbo oil feed line helped that decision! Bigger turbos on a stock motor! An option that actually works very well when performed properly. The stock turbos are small and lose their efficiency at the higher RPMs. They have trouble holding boost and terrible back pressure ensues.
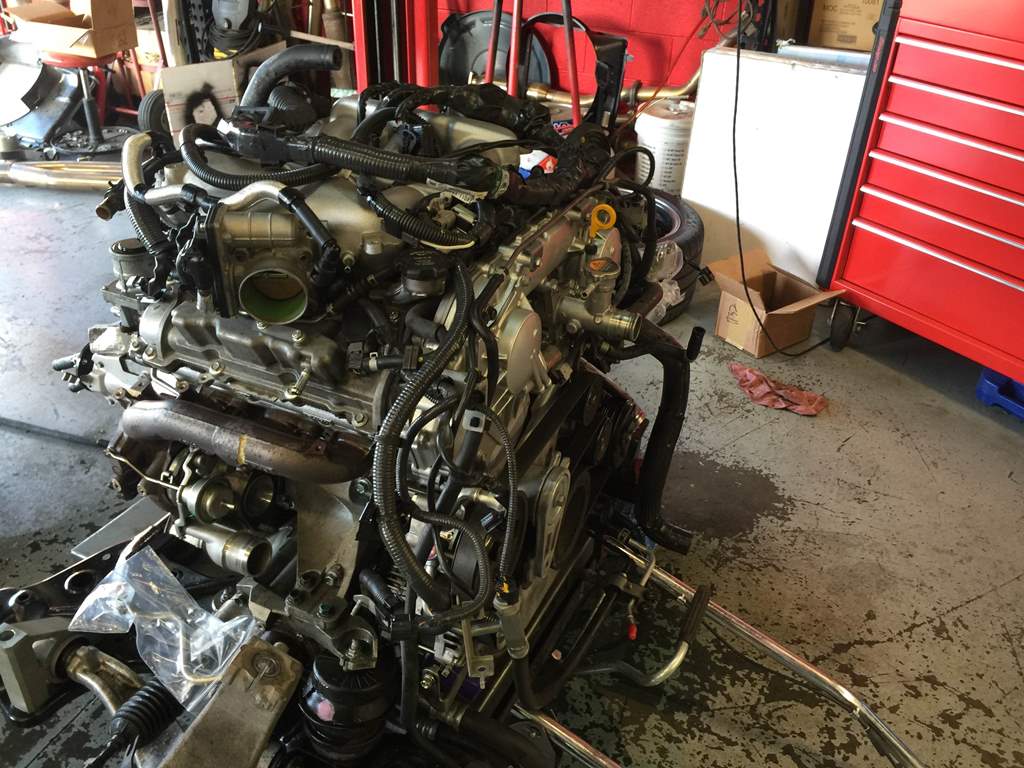
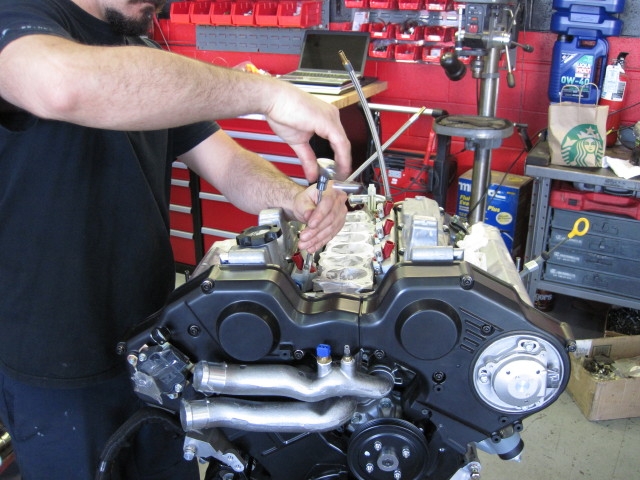
With the engine out we went to work pulling off the stock turbos and finding the culprit for the oil leak.
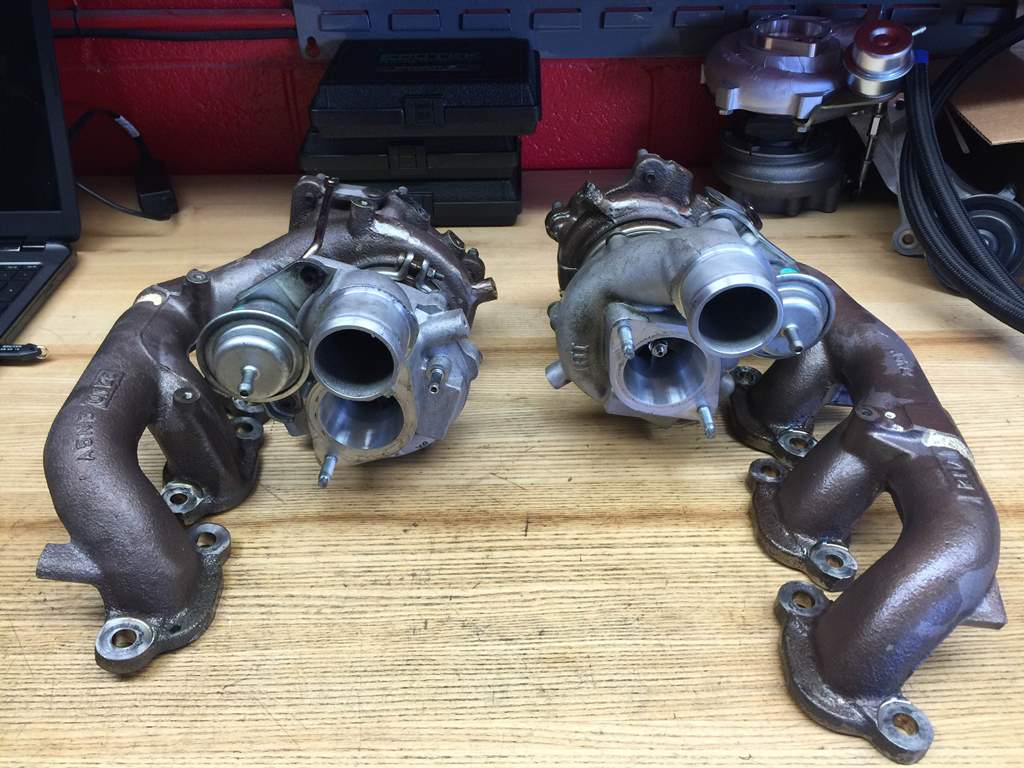
The stock turbos before they go in for surgery.
The passenger side turbo oil feed line pictured above. This portion of the line bolts to the top of the turbo with a banjo bolt and crush washer. If you look closely you can see the red arrow pointing to the crack in the brazing of where the line meets the banjo fitting. This is somewhat of a common issue. Nissan has an updated part for both the oil line and a bracket (2014+).
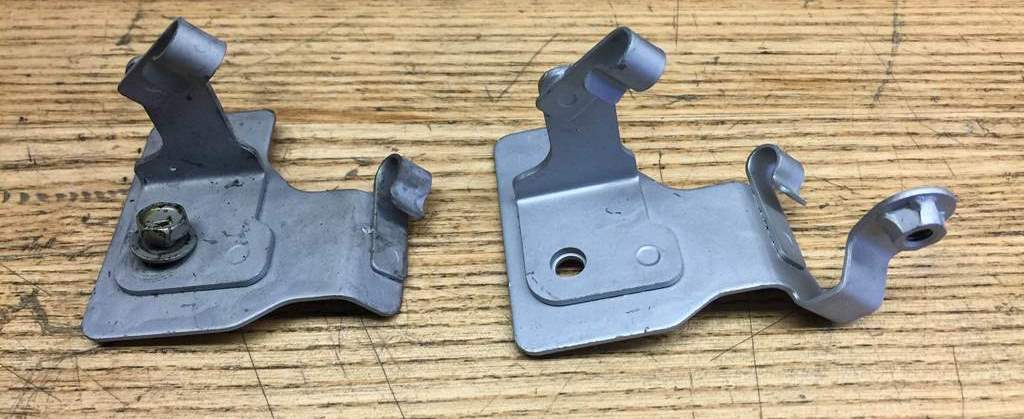
The “old” bracket on the left and the new on the right. You can see that the new bracket has an additional provision to support the oil feed line. The new line has an additional winglet to bolt to the new bracket.
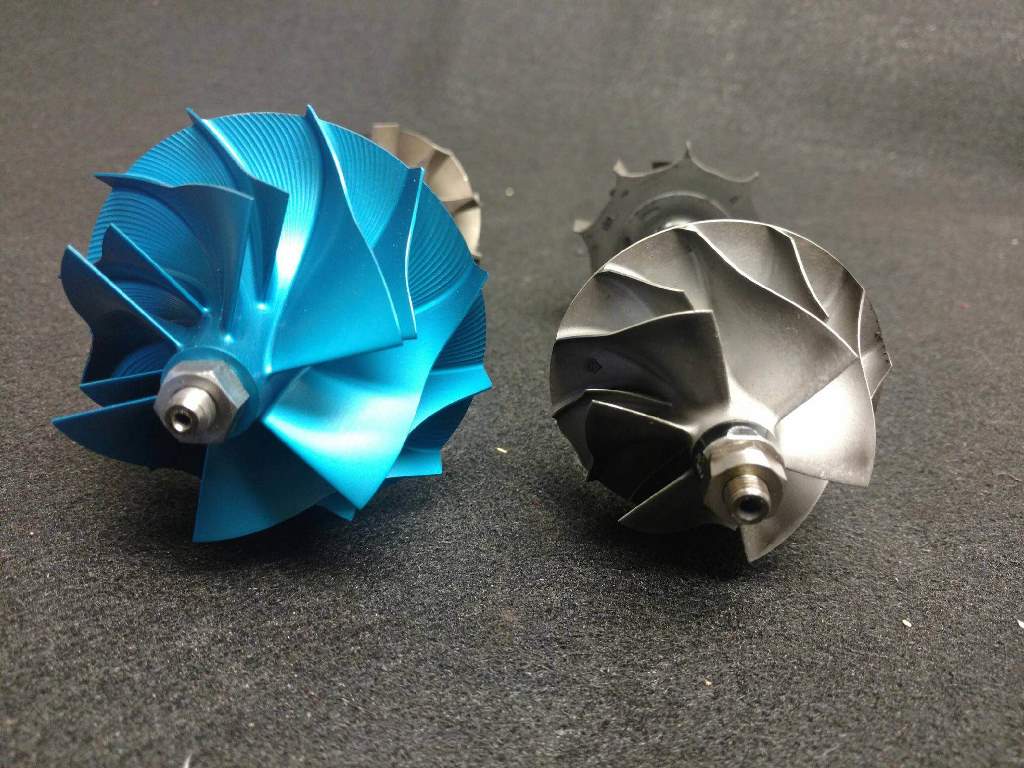
Our turbo upgrade came from RD Engineering. The anodized blue wheel on the left is the upgraded compressor wheel and the factory GTR compressor wheel on the right. A rather large difference!
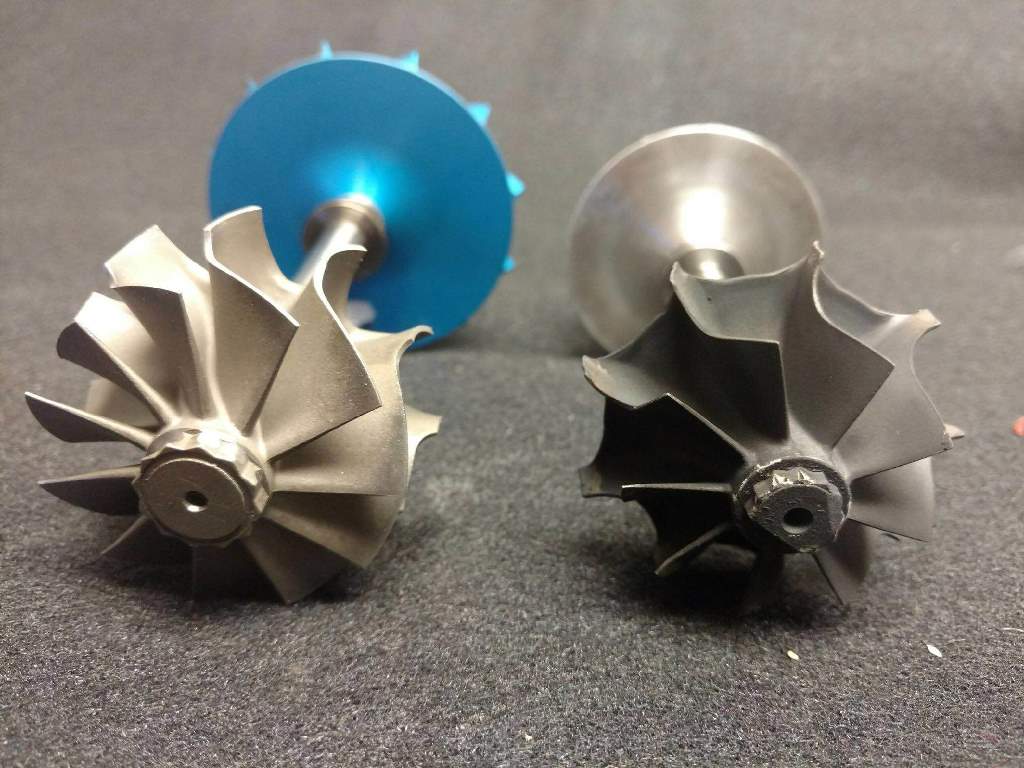
Turbine wheel also gets upgraded to help decrease that pesky back pressure.
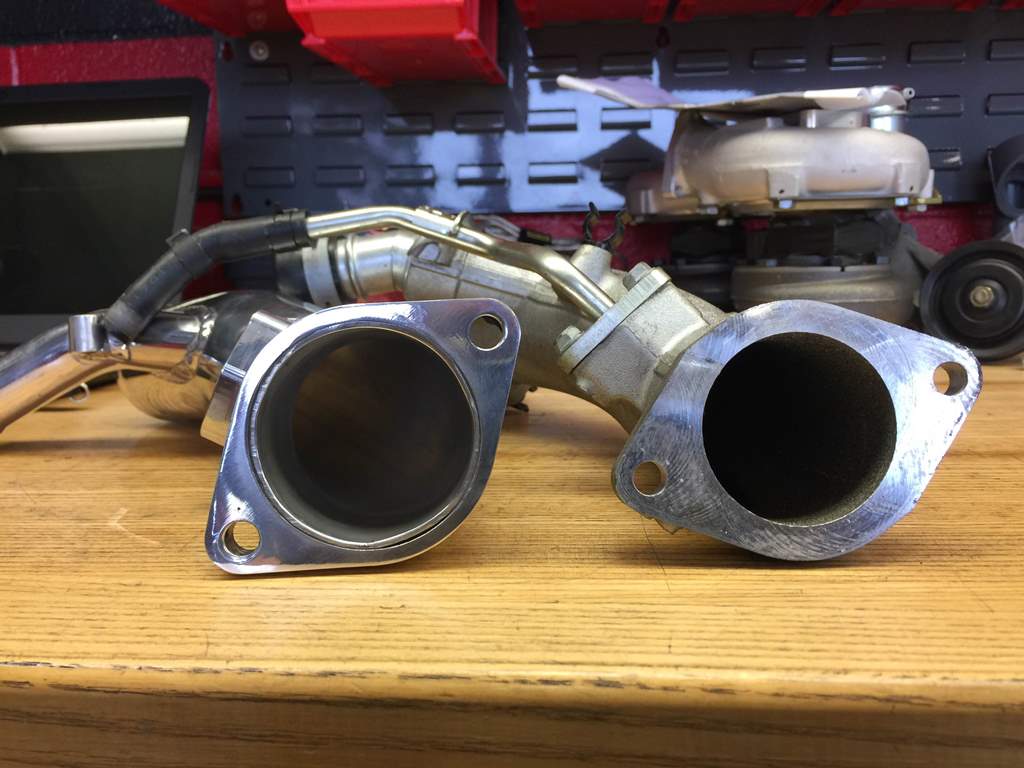
The only other upgrade performed while we were in there were GTC Turbo Inlets. GTC on the left and the factory DBA inlet on the right which is already larger from the CBA (2009-2011) models.
The upgraded turbos feature Turbosmart actuators.
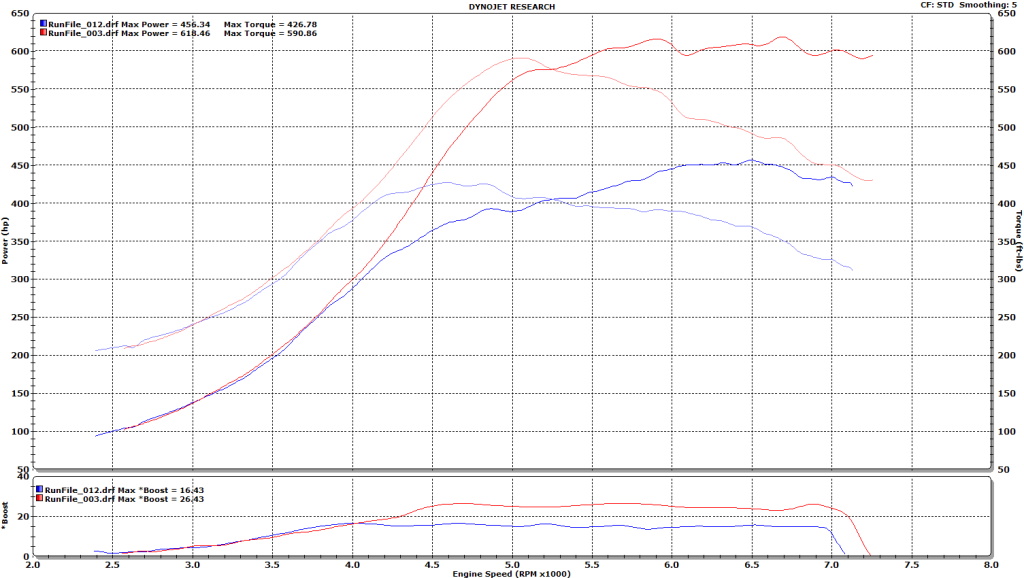
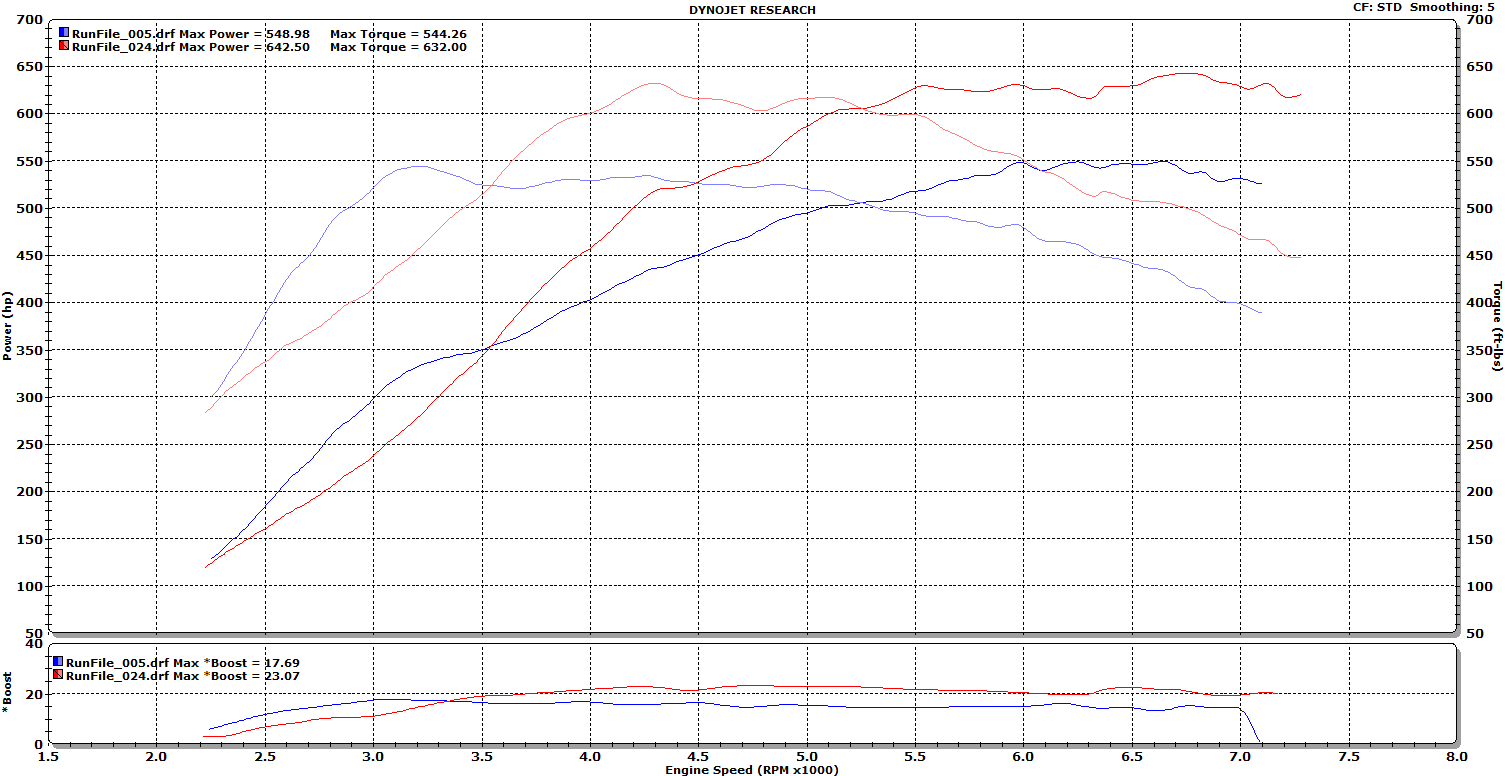
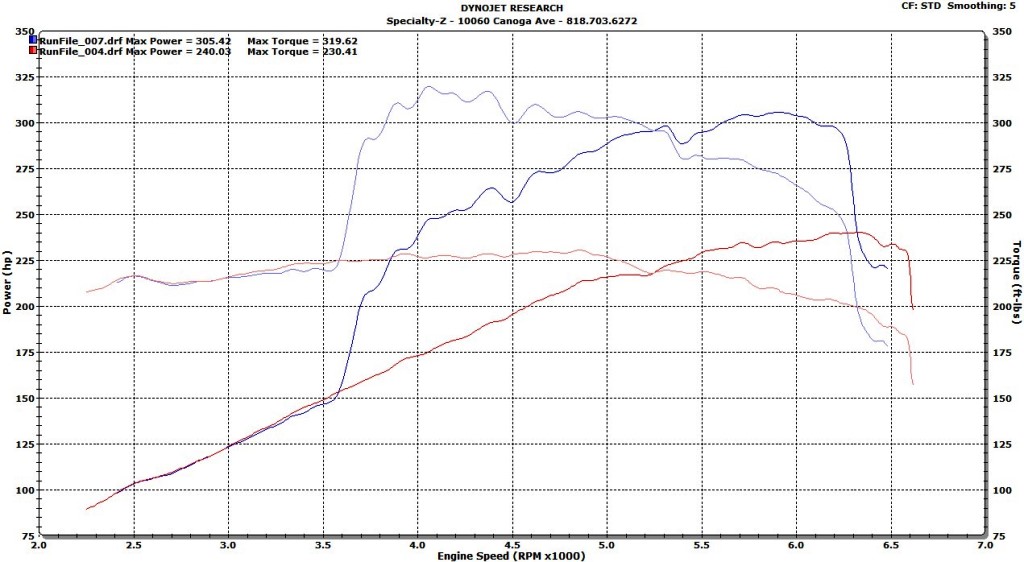
Above is the 91 octane dyno graph differences. Sam’s GTR has basic bolt-ons so the results can be better with modifications like an upgraded intercooler, intercooler piping, etc.. Blue was the power on stock turbos. Red is the upgraded turbos. This upgrade essentially allows one to run E85 FBO stock turbo power levels on 91 octane. A nice upgrade indeed if you don’t have E85 easily accessible. By 3500 RPMs the larger turbos start to take over on the stock motor and cams. As mentioned previously, more “breather mods” can help this. We’re also forced to limit our torque output with the stock connecting rods.
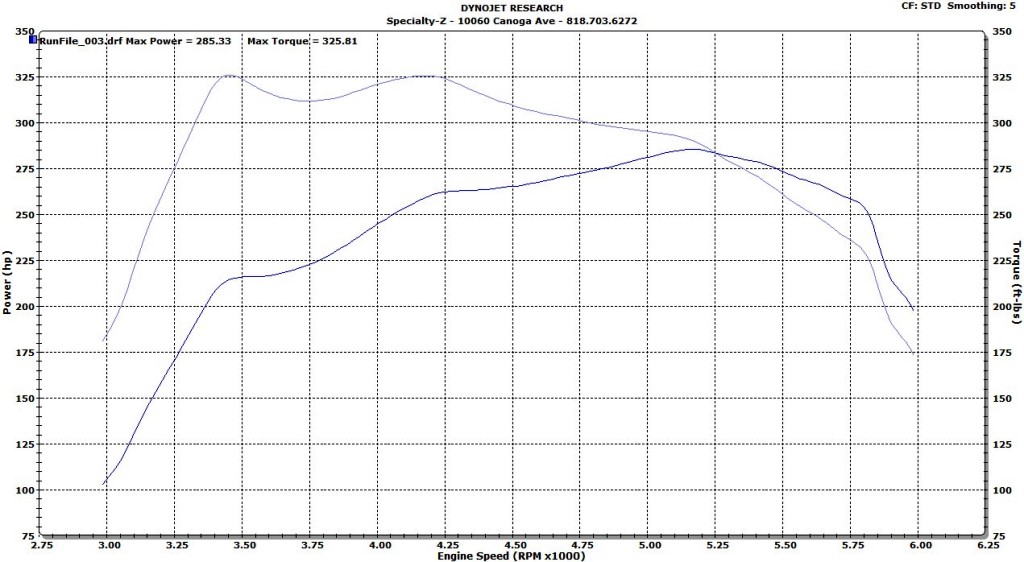
Our E85 dyno graph. Blue is stock turbos (please excuse the RPM cut) and red our upgraded turbos. Again we are having to severely limit our torque output on E85. The potential with these turbos on a forged motor is much more. One can see that the stock turbos hit rather hard in the beginning. If you look at our cursor pointing at 6500 RPMs you can see how much the stock turbos fall off on boost where the larger turbos shine. This is a reminder that upgrading actuators on the stock turbos is not recommended. Your only increasing your back pressures which are horrendous for the engine. Close to 800 whp on a stock engine and still able to keep the torque level in check which is the achilles heel of the factory GTR shortblock.
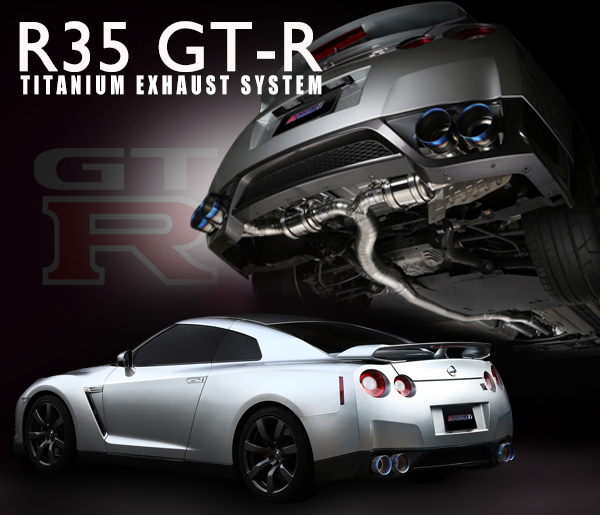
I’ll start off by sincerely apologizing for not staying up with the blog. The shop is super busy and my personal life is much busier with the addition of a second child. We recently had the pleasure of testing the Tomei Expreme Ti exhaust for the R35 GTR. Our test GTR has the following modifications performed:
SZ Built Motor (stock camshafts & stock heads)
USM Turbos
SZ 3″ Intake
Factory Intercooler & Piping
AMS Down Pipes
Fast Intentions Y-Pipe (Mil Spec Cats & Resonator) 3.5″
3″ Aftermarket Catback
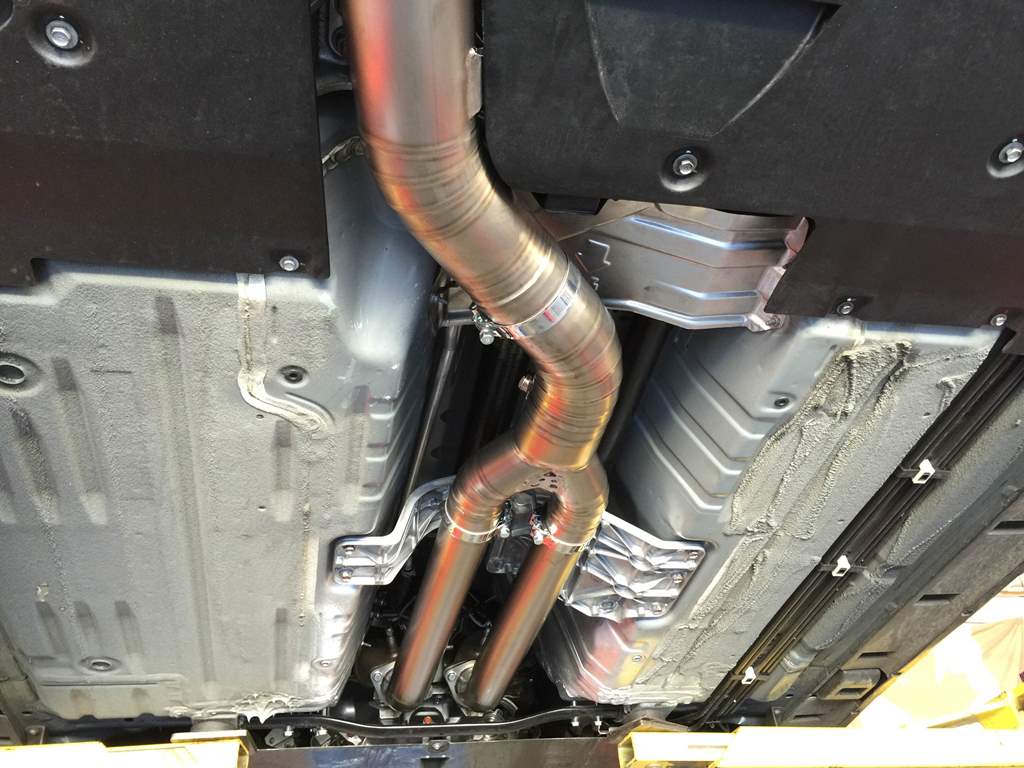
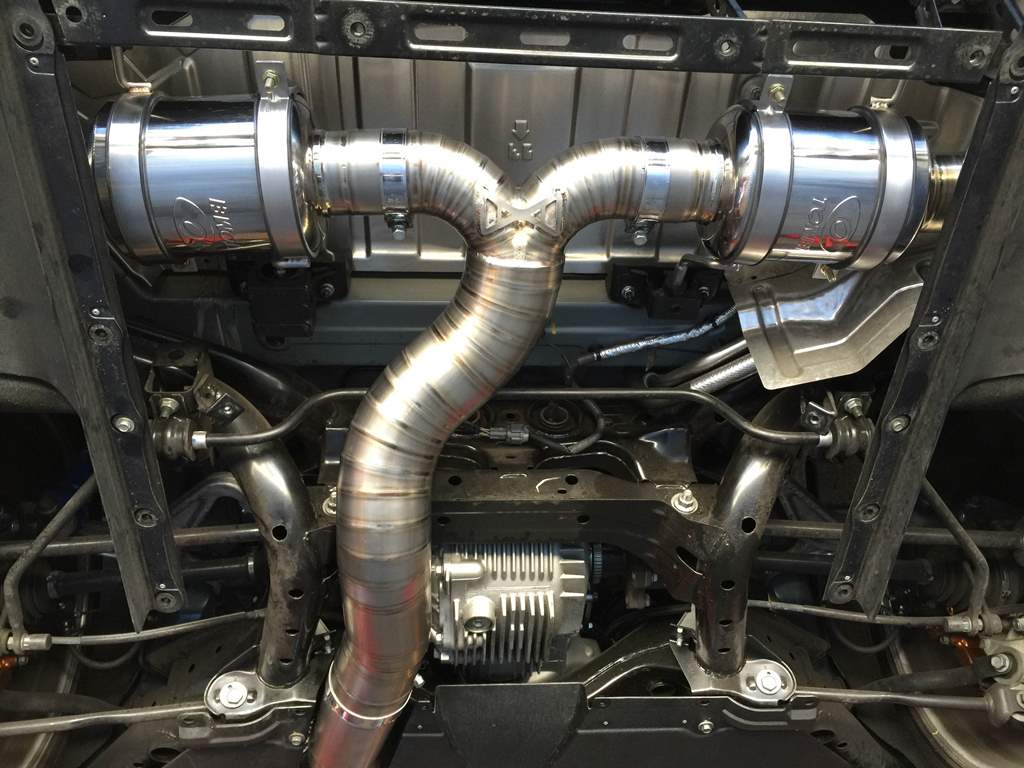
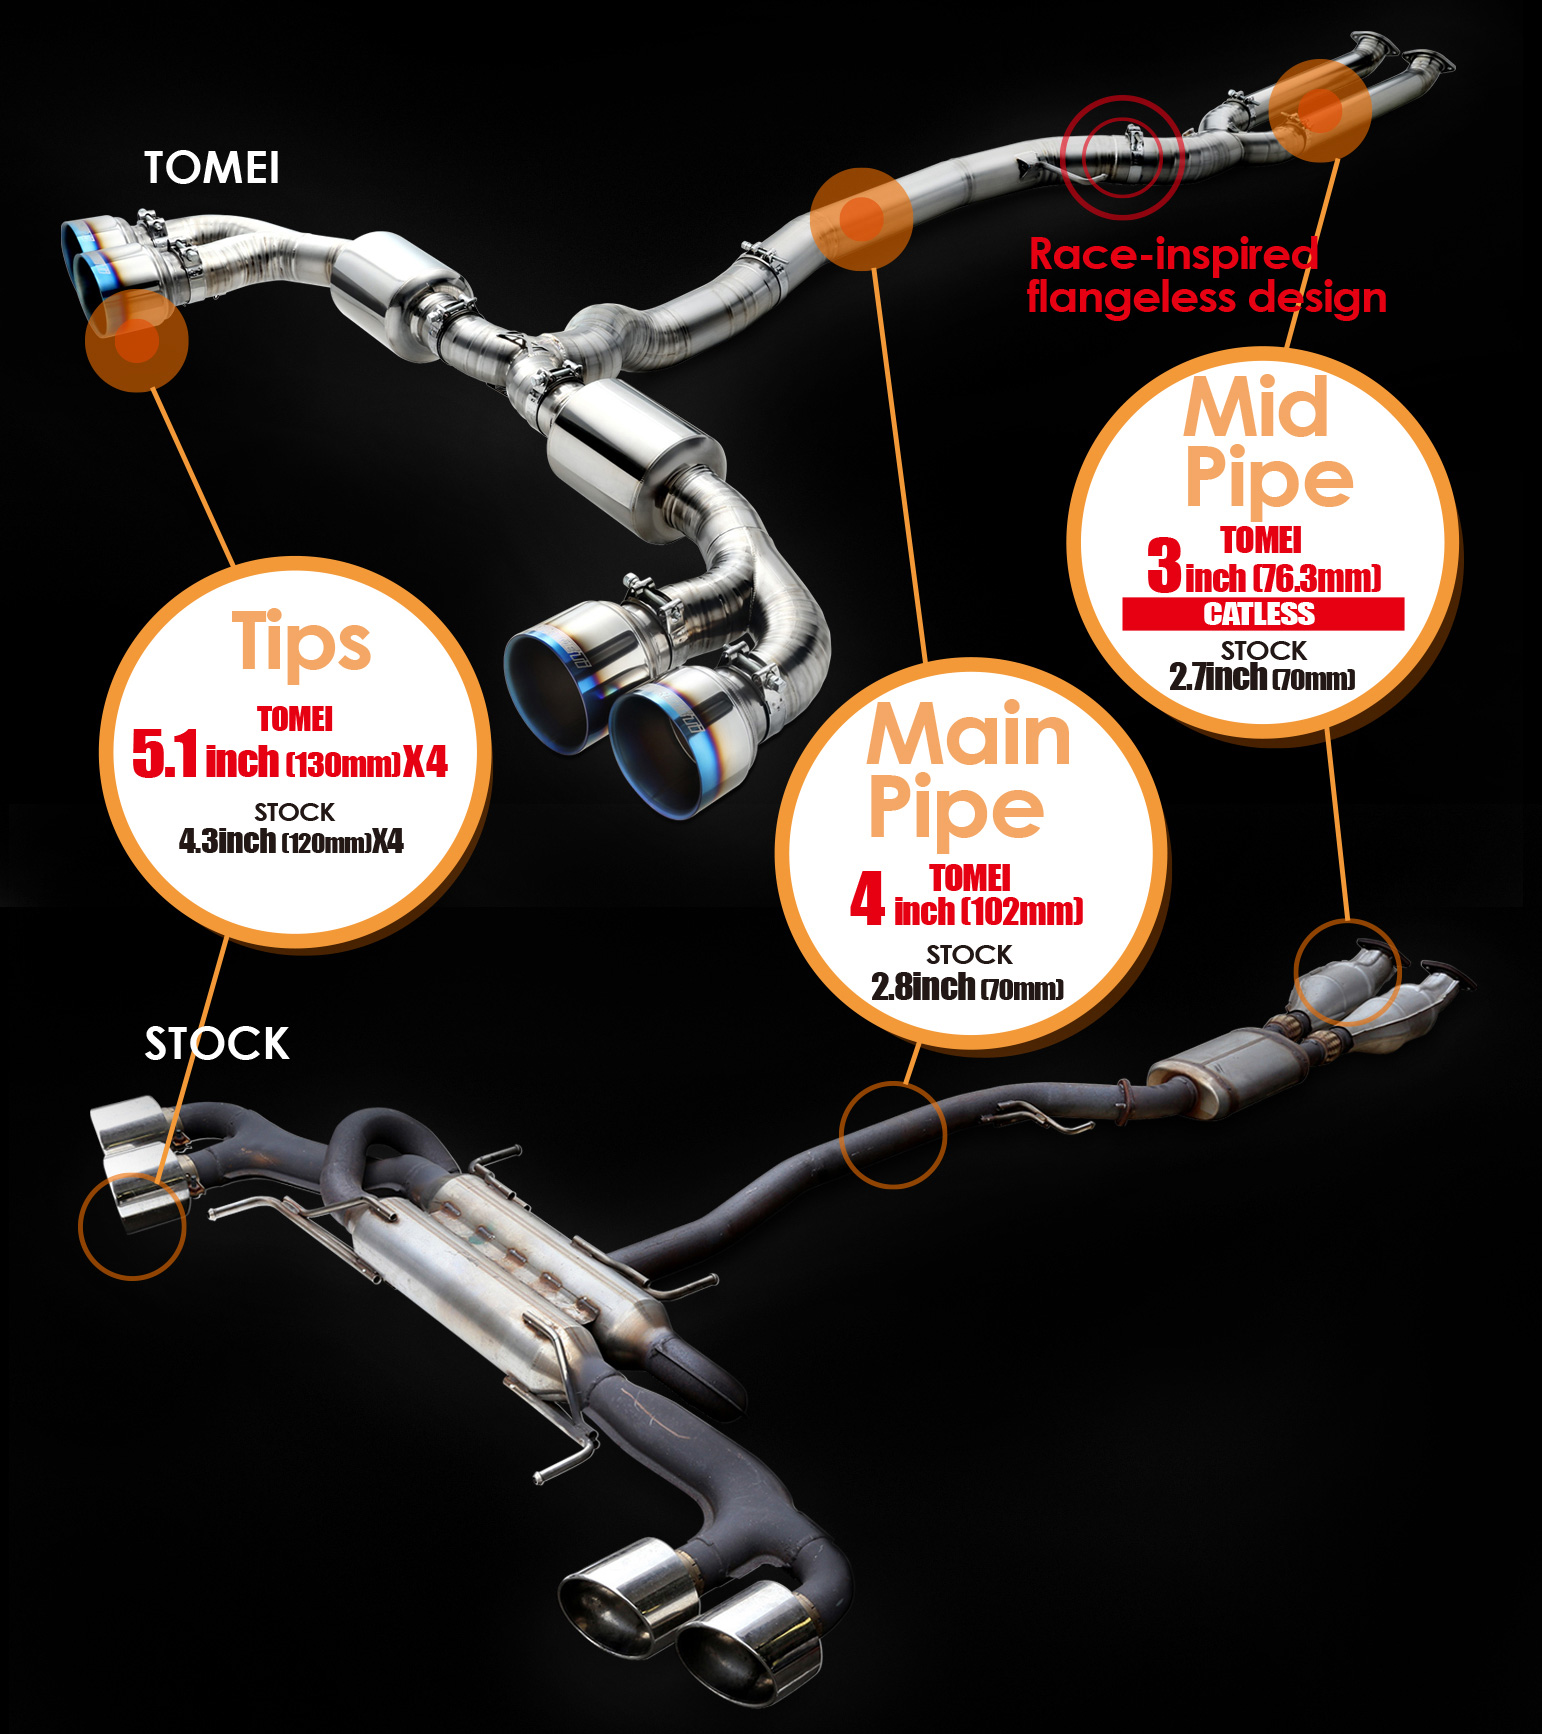
The system includes its own y-pipe using 3″ piping coming out of each down pipe outlet merging into the single 4″ pipe. The quality and fitment of the Tomei system is spectacular. Nothing had to be cut or hacked up to make the fitment of the 4″ piping go through the diffusers. Considering the system is made of titanium the MSRP of $3600 is a steal! The weight savings over a conventional SS system is amazing. Tomei says its a 35 lb savings over the factory pieces with the Tomei system weighing in at 32 lbs which includes the y-pipe.
Y-pipe dual 3″ from the down pipes into the massive 4″ sewer pipe.
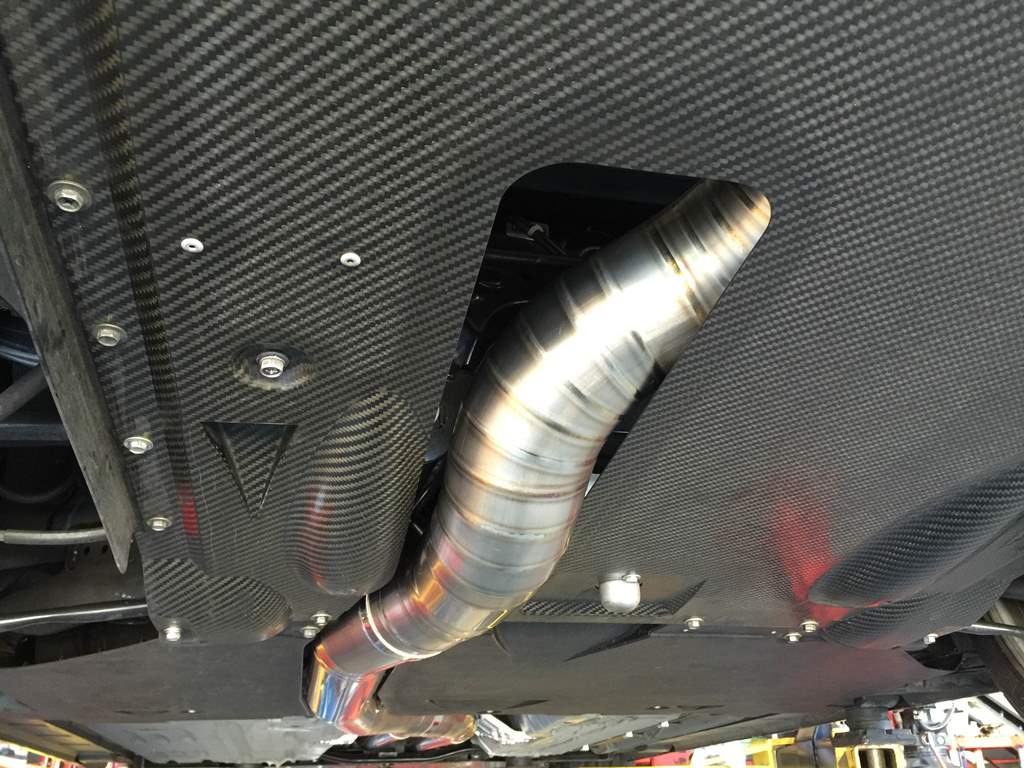
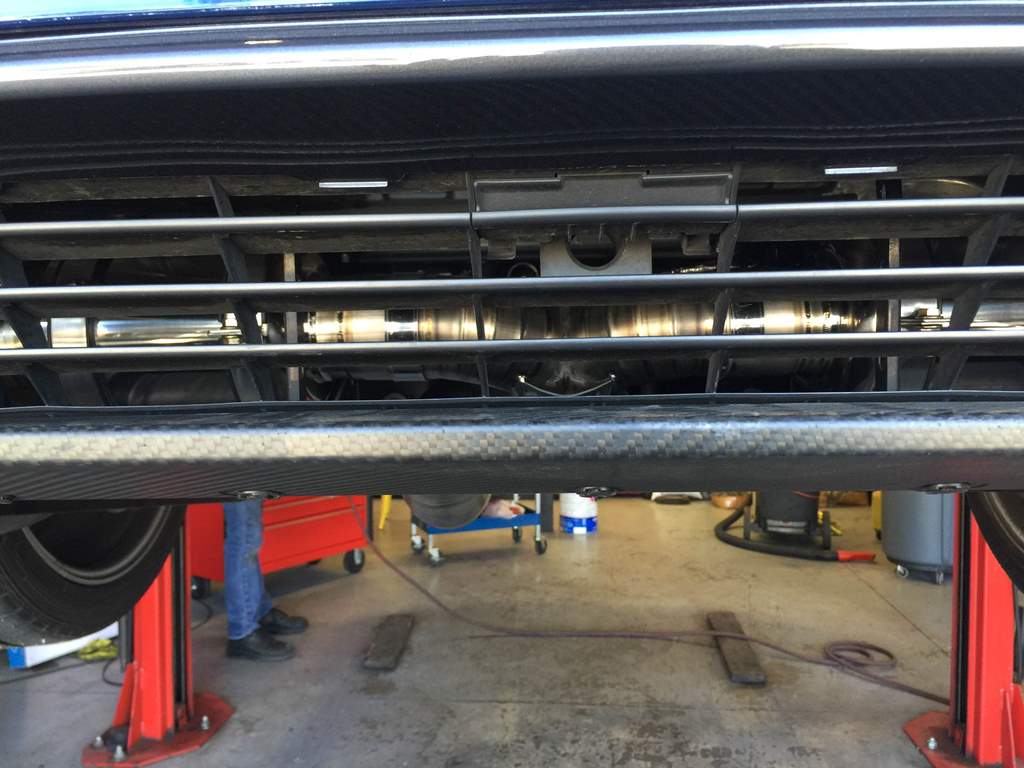
The system snakes its way perfectly through the diffusers without any problems. No trimming, no modifying. The welds on the titanium are beautiful for a mass produced system.
Straight thru “mufflers”.
The view from right above the carbon diffuser.
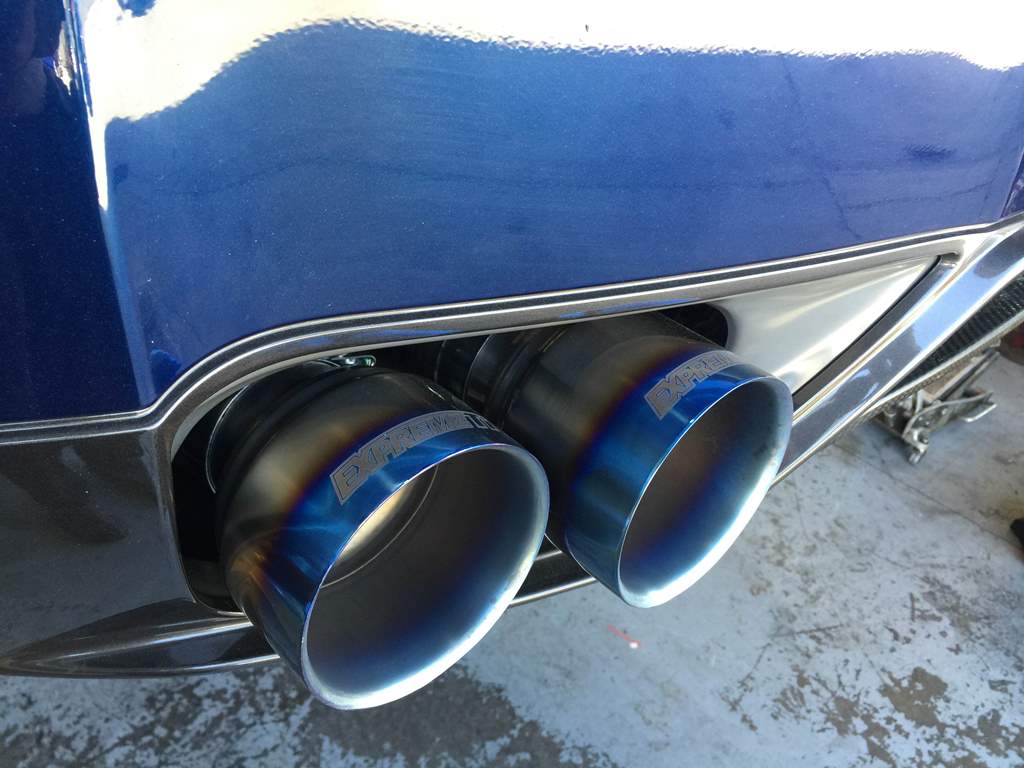
Everything exits out the huge 5.1″ tips.
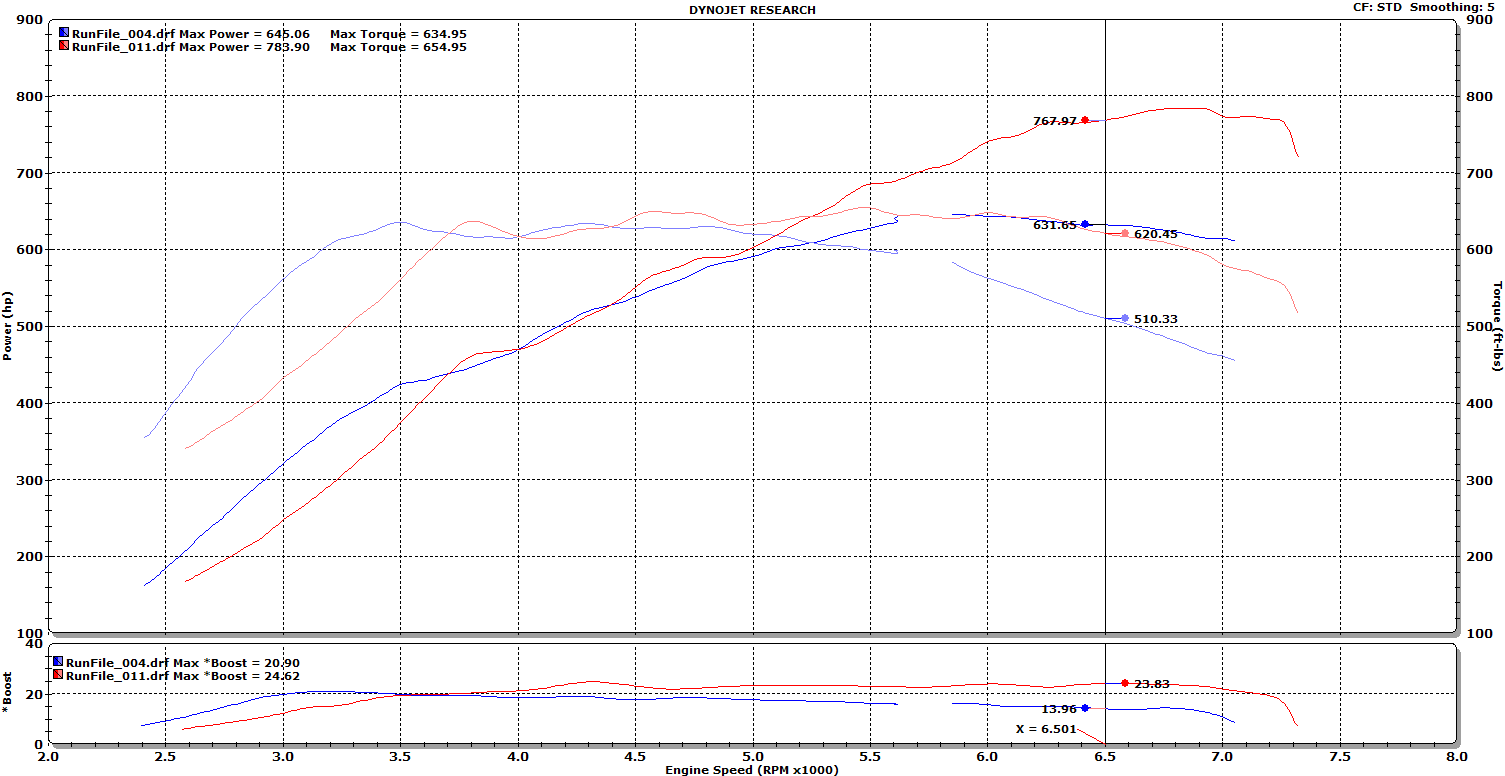
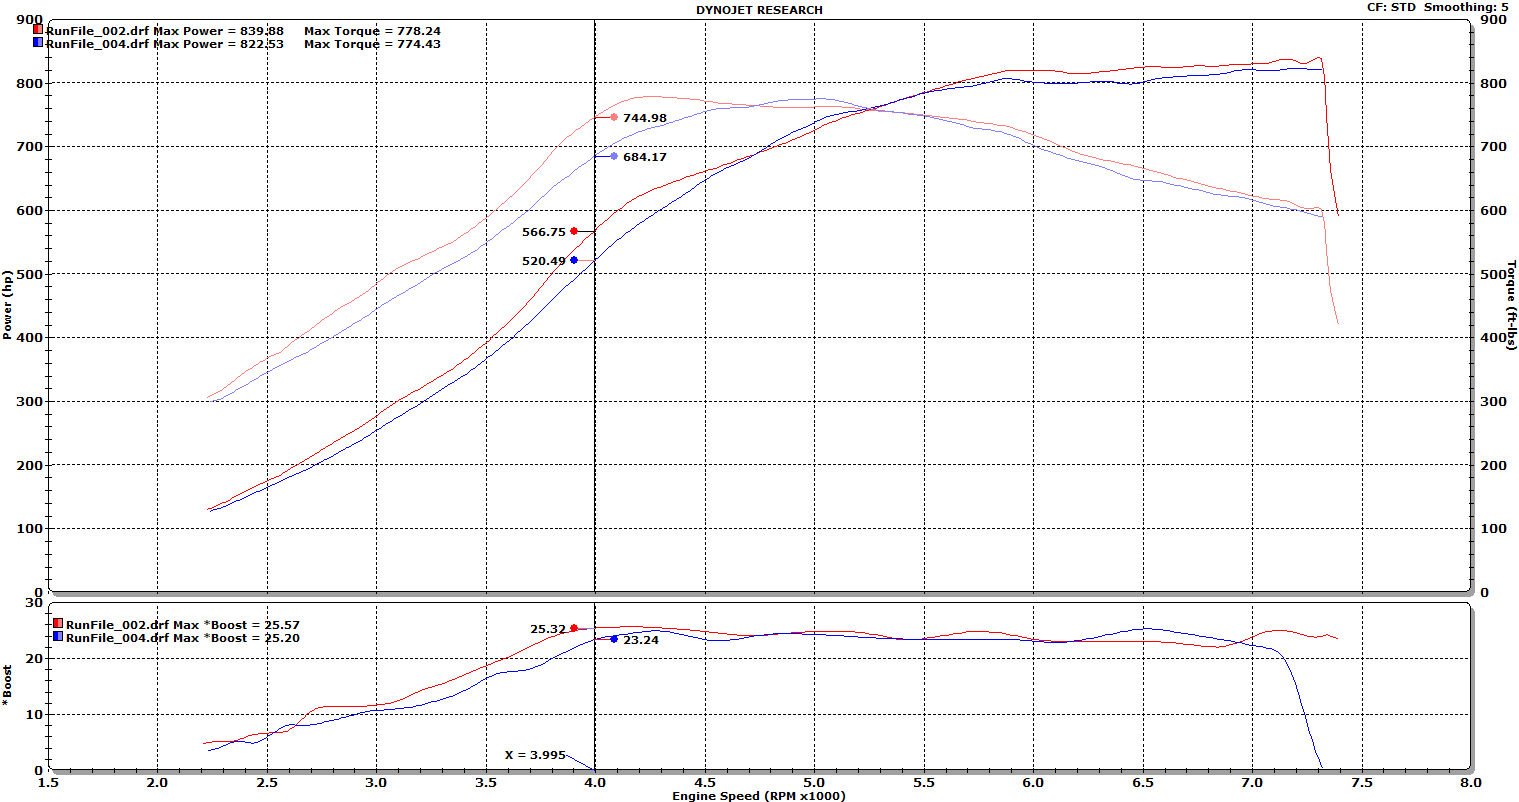
Dyno test before and after done within a few hours of each other. Blue is the old exhaust setup and red is the after with the Tomei system. The largest gains were below 4500 RPMs. At 4k we gained 60 torque and 46 whp. You can see the boost pressure go up due to the exhaust change. We expected to see larger gains at the top than we did but we won’t complain about 20-25 whp gains.
Posted by : Sebastian Chacoff On : September 28, 2015
1
Many times a week I’ve been getting this question asked. What is the difference between a supercharger and turbo kit for the VQ37VHR? For starters most people get the misconception that a supercharger will produce boost faster than a turbocharger. There is much more to that answer. It all starts with properly piecing together a kit and its intended purposes. Turbochargers of today are much more reliable, use more advanced materials, and are manufactured in such a way that all improve the turbo’s quality\reliability and performance. This is why you see more auto manufacturer’s producing their vehicles with more turbos and the fact that gas mileage can be improved without sacrificing power.
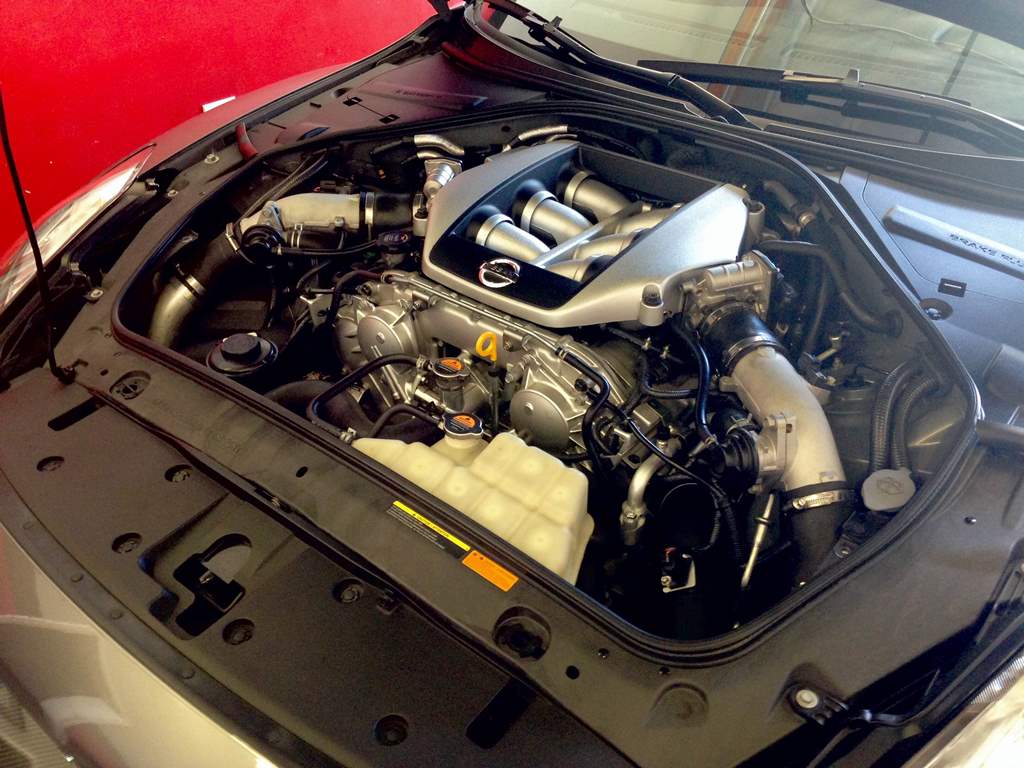
The goal of this post is not to give you all the in’s and out’s of how a turbo or supercharger work but to clear up the biggest misconceptions and present to you the visual difference of what a supercharged and turbocharged engine in this case the VQ37VHR look like with two very popular kits out in the market.
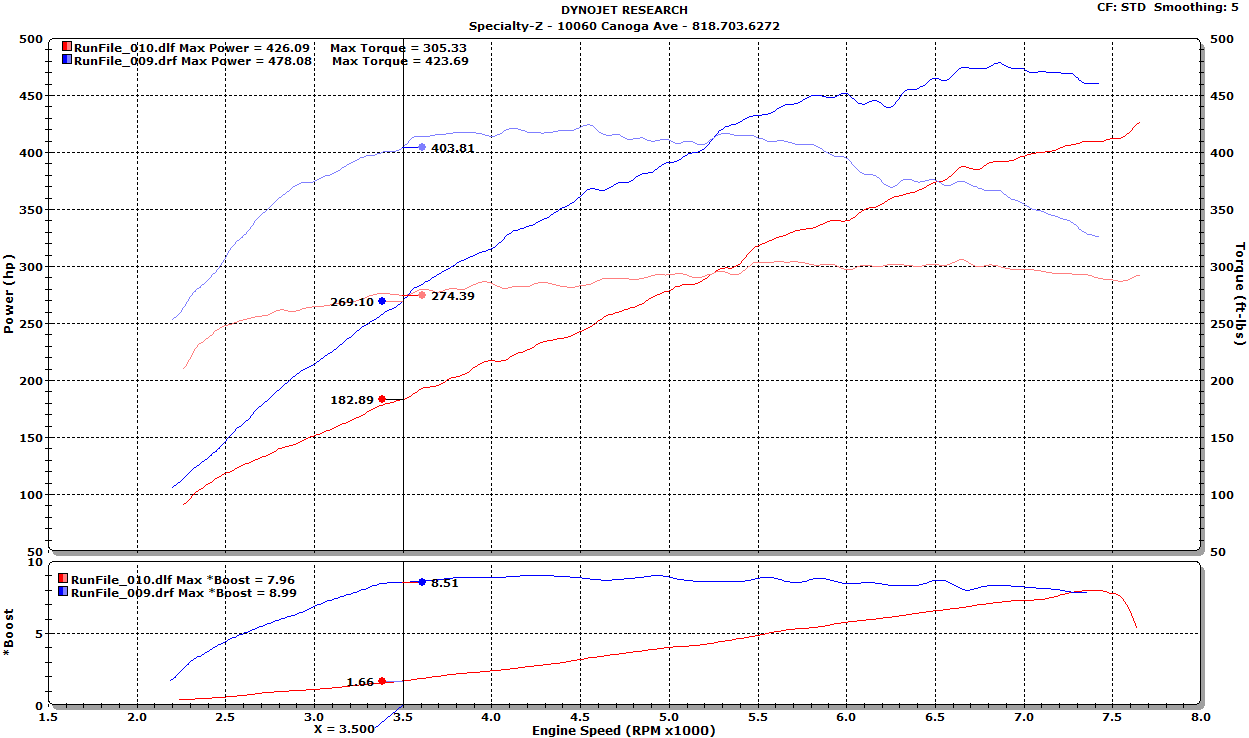
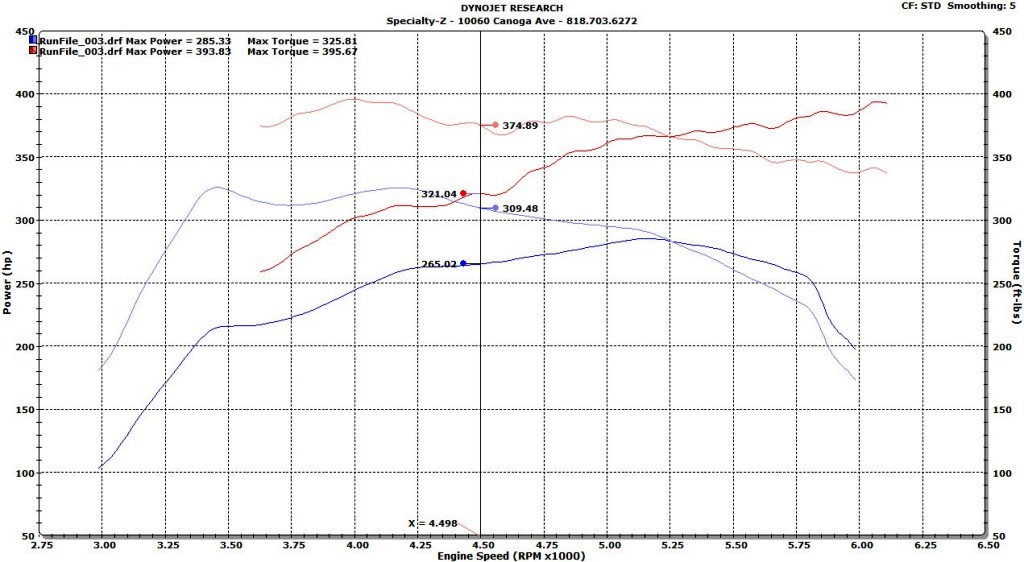
This dyno graph comparison plots both a SC’ed and TT’ed VQ37VHR against each other on 91 octane fuel. Red is supercharged and blue is turbocharged. This will definitely clear up the misconception that a supercharger can out spool a turbocharger. This particular supercharger is a centrifugal style which is known for its “lag” although people are unaware of it and differences between it and other supercharger styles. At 3500 RPMs you can see our plot. Boost on the SC’ed engine is 1.66 psi. Boost for the TT’ed engine is 8.5 psi. This correlates directly into power and torque of course! Let’s look at the differences there. We’re producing 274 torque on the SC’ed engine and 403 torque on the TT’ed engine. That’s a difference of 129 torque. I bet you can probably tell me which car would be funner to drive. Horsepower for the supercharged engine is 182 whp and 269 whp for the turbocharged engine. You can also see that peak power is also higher on the turbocharged engine.
A supercharger kit is cost effective to produce and install. There are less parts and much less labor involved to install it. The opposite is true for a turbocharger kit. However you can reap the benefits of turbocharging when you’re all done! It WILL put a bigger smile on your face, this is fact.
Posted by : Sebastian Chacoff On : January 22, 2015
0
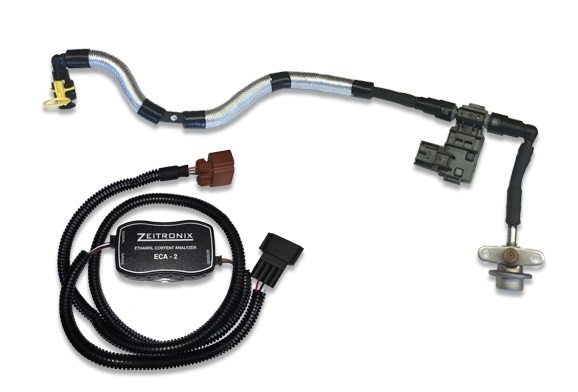
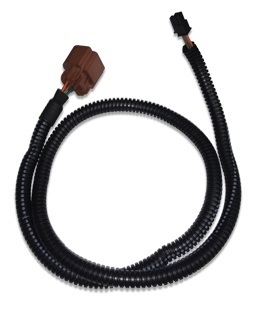
We are proud to announce the release of the SZ Flex Fuel Kit for the R35 GTR. This kit makes for the simplest, cleanest, and quickest installation. We had our own mold made to make the connection between the ECA-2 and ECU seamless and trouble free. We use a brand new Nissan fuel return hose to make the kit look like it came from the factory.
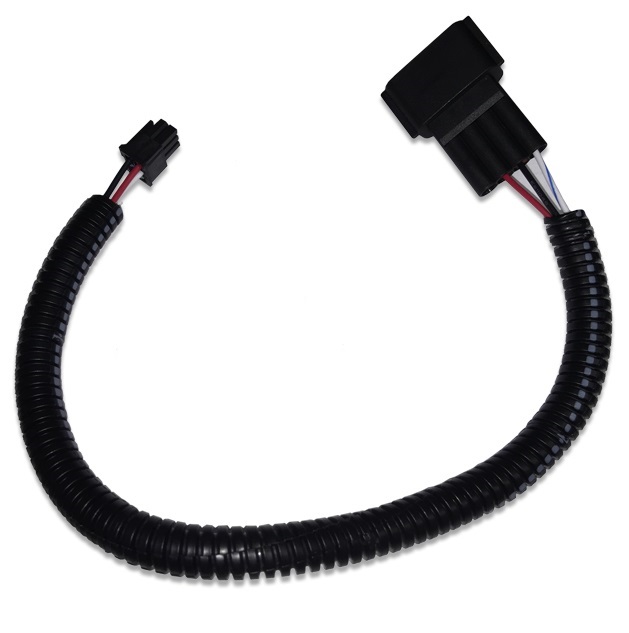
Our ECA-2 to ECU harness. Our molded connector on the right hand side. Both harness’ cut to length.
Posted by : Sebastian Chacoff On : January 18, 2015
0
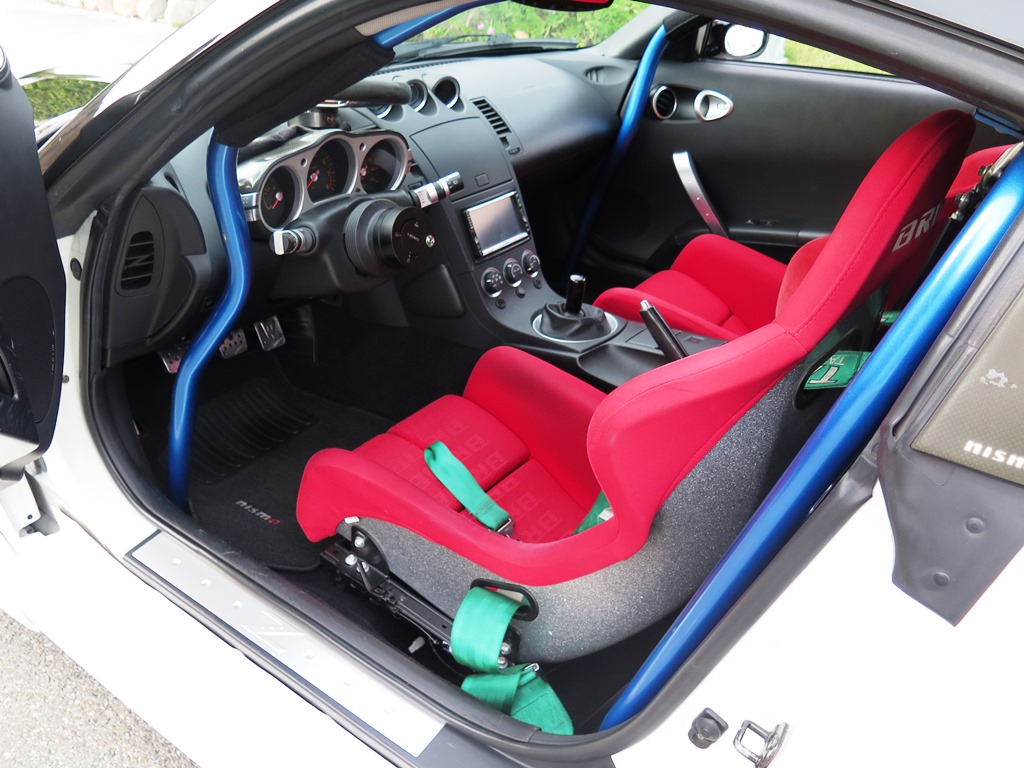
Corey brought us his widebody 350Z for some power upgrades in the form of nitrous oxide. We went to work installing the Dyno Tune Z33 Nitrous Kit. Besides installing the main portion of the nitrous system that includes a fogger nozzle, fuel & nitrous solenoids. A bottle heater was installed that turns off and on based on pressure in the nitrous feed line. This makes sure that the appropriate amount of nitrous is injected. The nitrous jets are calculated based on a certain nitrous pressure. So if the pressure is too low, the power will considerably drop and the mixture ratio of fuel is dramatically off. Same for too much pressure. A nitrous pressure gauge was installed in the factory gauge pod on the dash to properly monitor the nitrous when used on the street. An NOS brand controller was used to make sure our nitrous turns on and off at a certain RPM and throttle opening. Nitrous can easily wreak havoc on connecting rods if used too low of an engine speed. It can also spell disaster if not turned off in time before the rev limiter hits. A purge system is also used to ensure fresh nitrous is on the ready at the tap of a button.
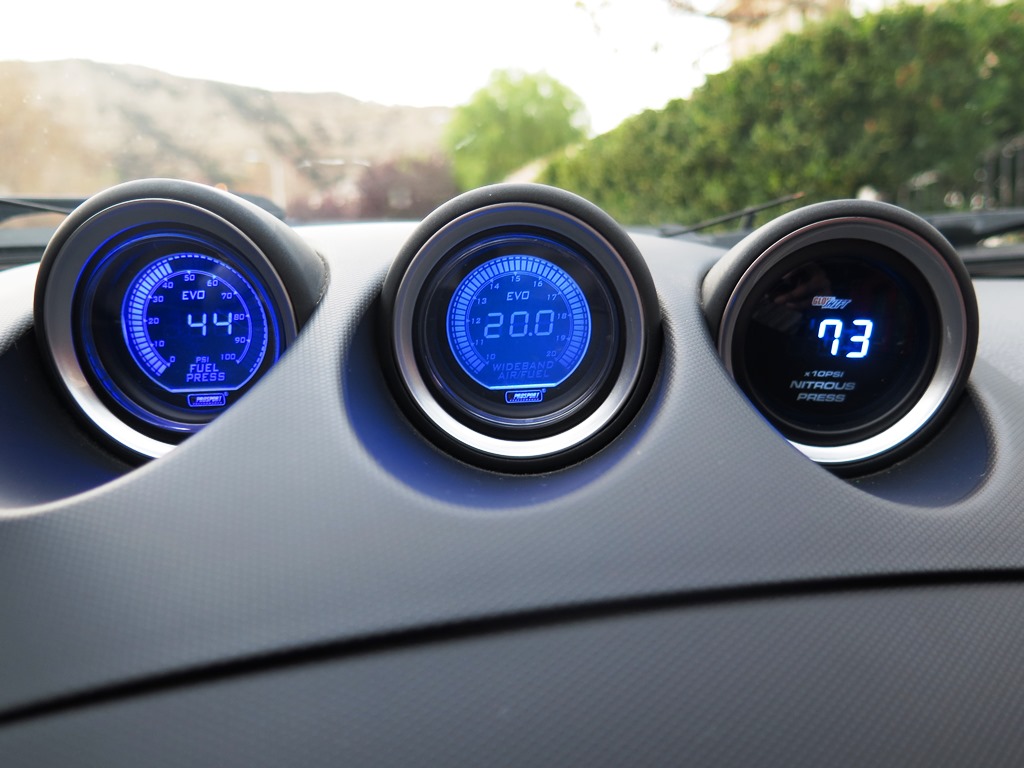
We installed three switches underneath the AC controls. One is for main nitrous activation, purge, and bottle heater.
We also installed a fuel pressure gauge and wideband AFR gauge. Nitrous pressure gauge on the very right.
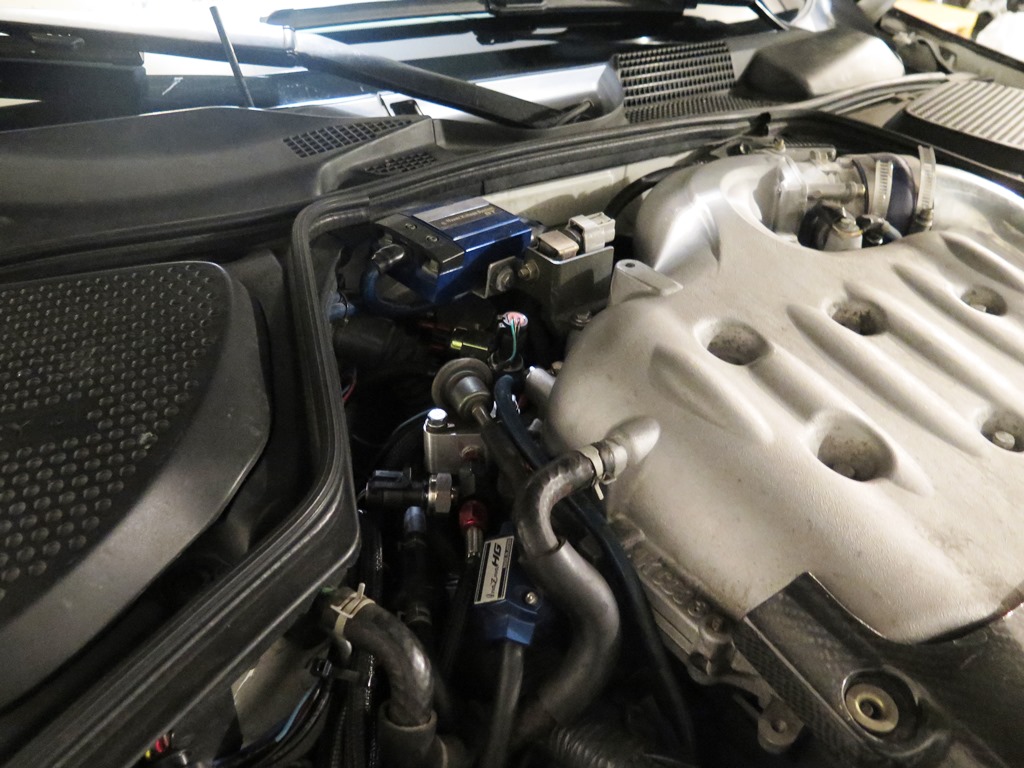
The main fogger nozzle was installed underneath the main TB pipe which cannot be seen for a stealth install. Here you can barely tell anything is installed related to nitrous. The Dyno Tune system includes a nice fuel adapter to easily tap in for fuel. We installed 2 steps colder from stock spark plugs to keep things happy.
You may have been wondering the size “shot” we installed. Corey originally wanted a 100 HP shot and I declined for matter of safety on 91 octane. We both compromised in the middle and installed a 75 HP shot of jets. We made sure the non nitrous tune was where it needed to be. We then adjusted the tune to take into account the nitrous and fuel mixture on 91 octane. You can see that out 75 HP works beautifully. Just the right amount of power and safety when you install all the correct parts (and install them correctly!).
Posted by : Sebastian Chacoff On : January 4, 2015
3
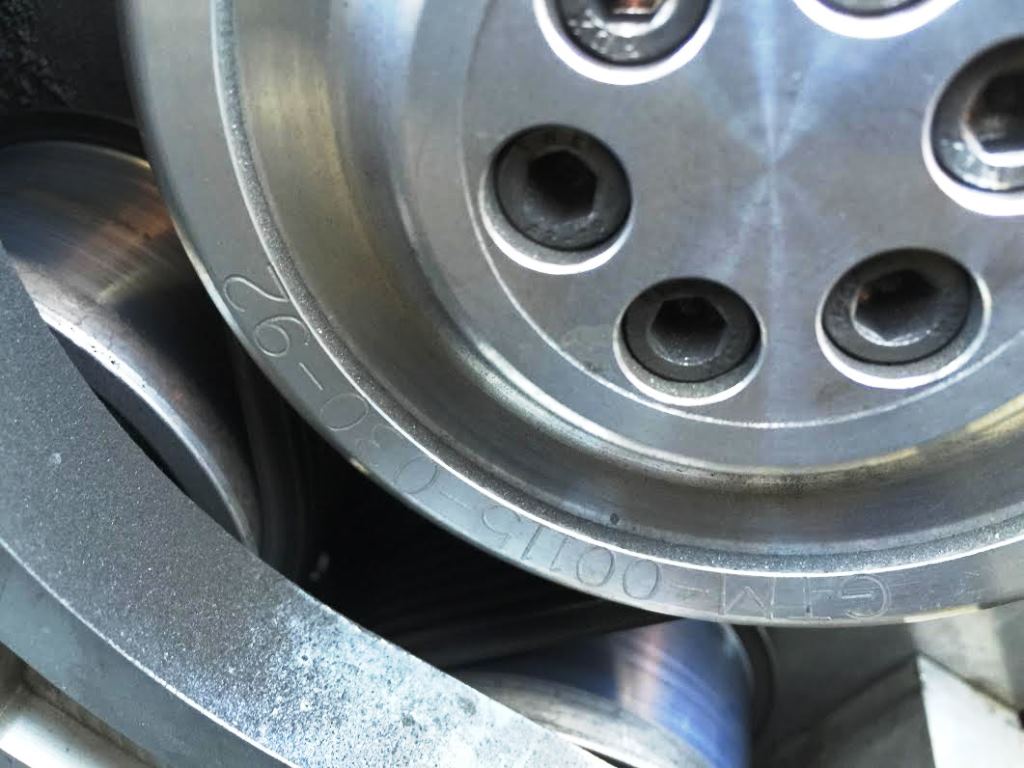
Our Nissan Titan truck now has 60k miles on the odometer and the last 20k miles have been under the hard use of forced induction. What started as a utility and towing vehicle now is a “hot rod” pick up. Able to perform its original intended duties with more ease we’ve been very happy with the truck’s performance and reliability all around. The auto trans has held up great with the added power and torque with the proper additional supporting modifications consisting of a valve body upgrade, larger capacity trans oil pan (that is finned), and cooler. Forced induction came the way of a GTM Rotrex Supercharger Kit. The truck was used as a the initial prototype and had no existing modifications. Its been over 2 years now and we’ve added modifications to the truck besides the GTM SC Kit. Our truck is a 2010 so it has a few more advancements from the earlier gen Titans like variable cam timing and stock exhaust upgrades that help make more power throughout the entire powerband.
The Titan as it spun the rollers bone stock a few years ago.
The video above shows the parts very well and features the angled intercooler placement to fit the front bumper perfectly.
Here is our stock baseline in blue and the GTM SC kit making a peak of 5 psi at the very top of the RPMs. At 4500 RPMs the truck picked up 65 torque and 57 whp. Peak power is 108 whp higher and 70 more torque.
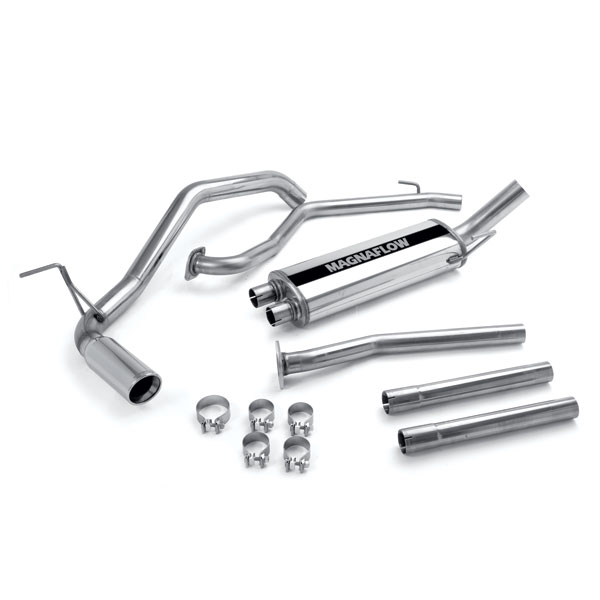
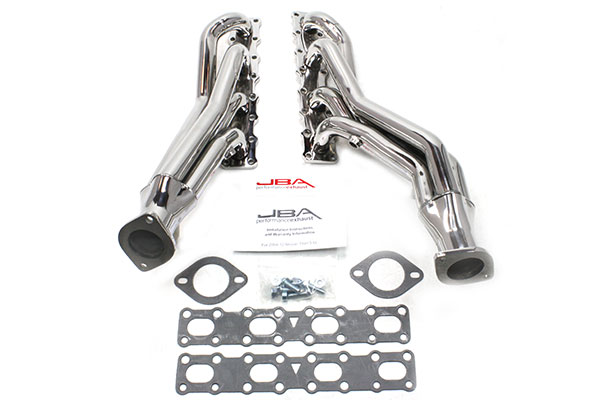
Never happy with what we have, we began the process of adding more modifications. A MagnaFlow Catback was added, Cajun Catted B-Pipes, and JBA Headers.
For the money, it is hard to beat this catback offered in the Titan\Armada community.
The JBA headers were very nice, but proved to be tough to install due to the flange holes being too small. We had to drill out each hole so we could install the headers onto the factory studs. Surprisingly even after 10k+ miles of forced induction and over 45k miles, the stock exhaust manifolds had survived and not cracked! NA Titans are known to severely crack their manifolds, check a previous post here.
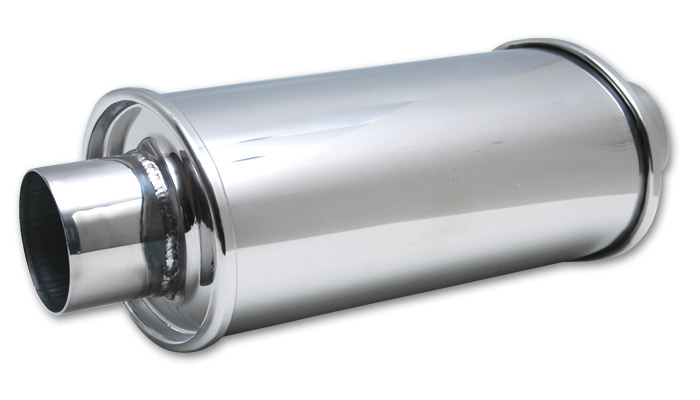
Once we had all our exhaust parts installed, the sound proved to be extremely loud, even with cats and a 22″ muffler. This was remedied with the addition of a Vibrant Ultra Quiet Resonator. This resonator did wonders in improving sound quality and lowering it.
The Vibrant UQ Resonator
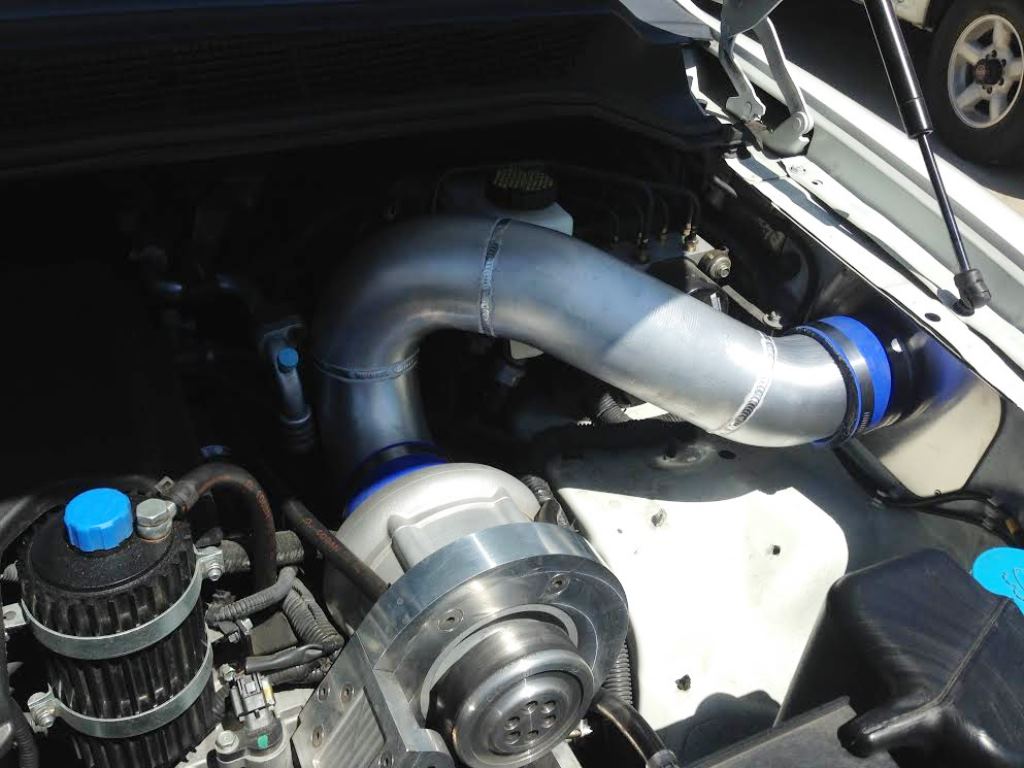
We next moved to improving the induction of the GTM kit. In the video above you can clearly see the air filter located in the engine bay. We went a step further and made ourselves a “cold air intake” by relocating the filter to the upper fender area.
Our custom CAI. No more engine bay heat adding to the overall air intake temps. A nice plate surrounds our secondary pipe in the fender.
We hit the dyno after installing all our exhaust and induction modifications. Our blue run is the GTM SC Kit with NO other mods. Red is WITH our added modifications. We were NOT surprised to see the drop in power up top. One downside of actually making the engine more efficient is you make it harder for there to be restriction which is a measurement of boost. Since we removed restriction, we lost boost, and hence we lost some power. Our power loss was specific to the high end of the RPMs coming in at 5500 RPMs. Our mods proved that making things more efficient we were able to gain more low end power with less boost. What are we to do next? How do we regain our power up top?
We looked at our next deal maker, the SC pulley size. The larger the pulley, the slower it will spin. The smaller, the quicker and the more boost it will produce for a given engine speed and balancer size. One must take care in making sure to not overspeed the supercharger. Thankfully for us our engine only revs to about 6100 RPMs, giving the SC some headroom from overspeed. The pulley on the kit came with a 92mm. We stepped “down” to the smallest offering of 84mm. Many thanks to Pablo at GTM for hand delivering the pulley to us! Thank you so much! What did the 8mm decrease in size get us?
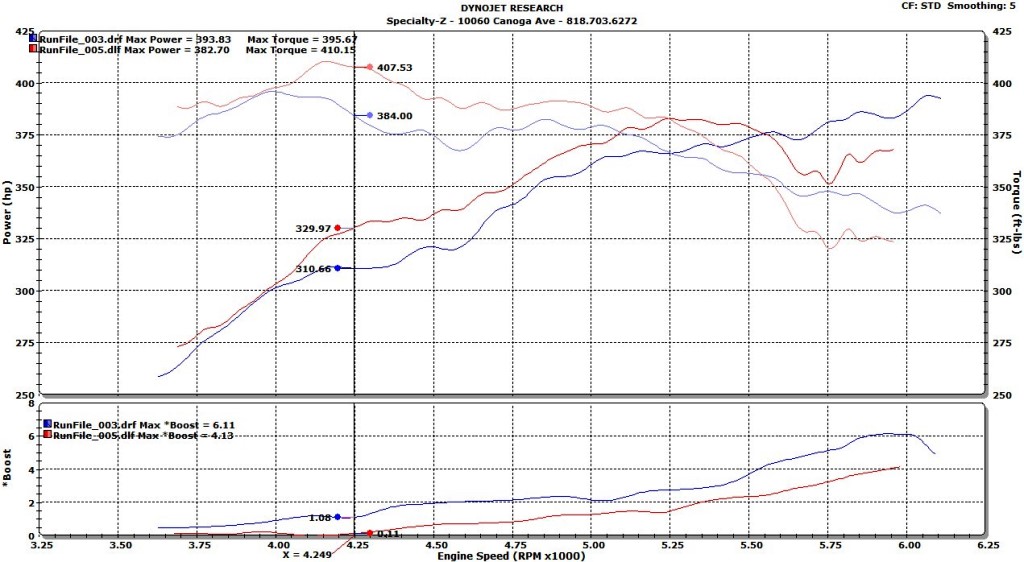
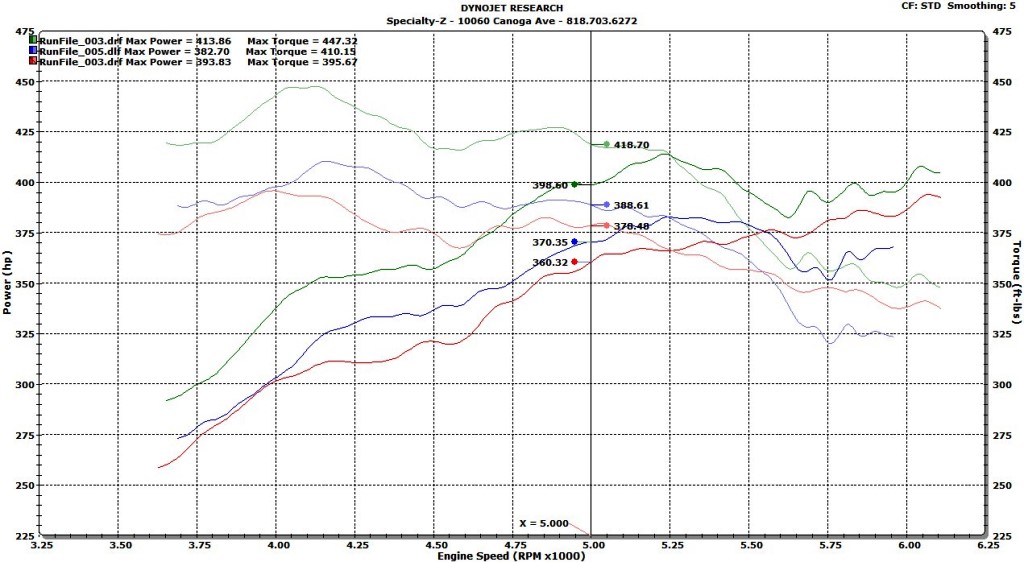
This graph shows the base GTM kit with no mods in red, our bolt on mods with the base GTM 92mm pulley in blue, and our 84mm pulley with mods (latest and final) in green. We picked up significant power all over. Peak torque now comes in nicely with a total of 447 and peak power of 413. We found an average gain of 30 whp and torque throughout the powerband. Boost came back up to 6 psi.
The last upgrade we performed was a Eaton True Trac LSD for DRAMATICALLY improved grip and 3.73 rear end gears, up from a pathetic 2.93. Needless to say, the Titan has embarrassed its share of cars who were left shocked and speechless.
Posted by : Sebastian Chacoff On : December 19, 2014
4
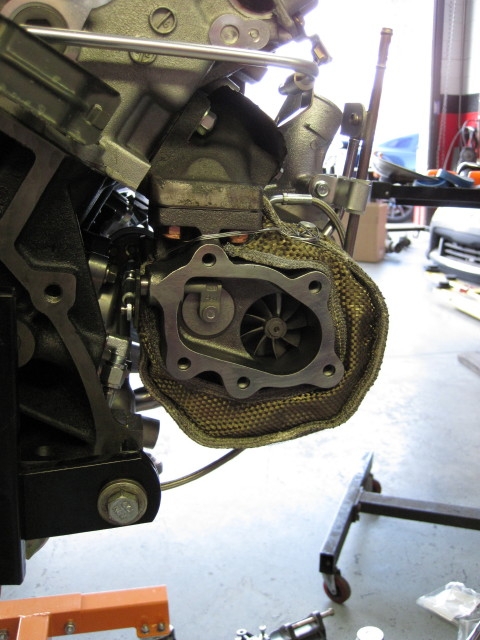
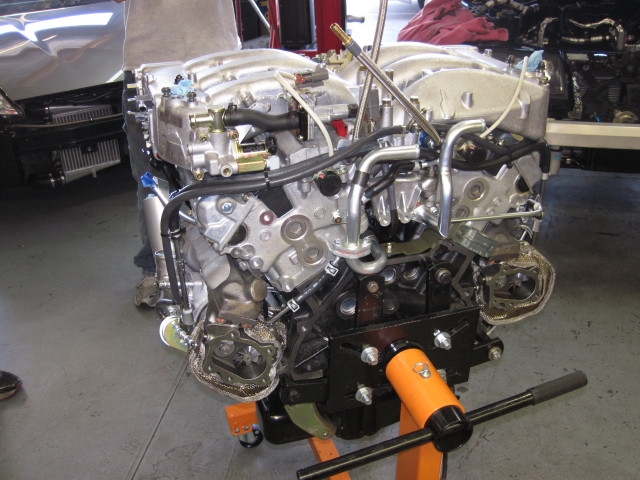
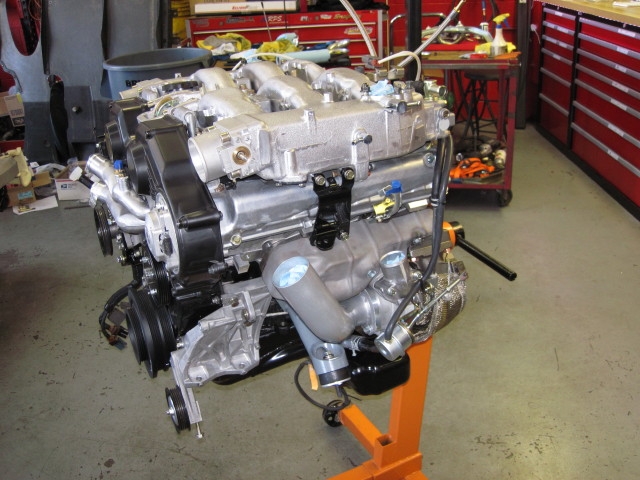
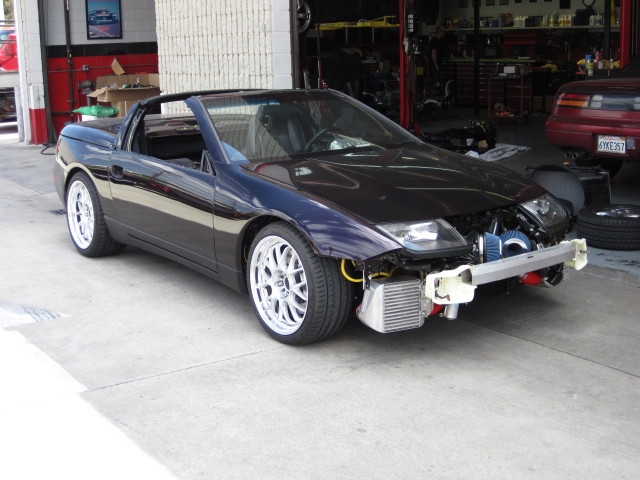
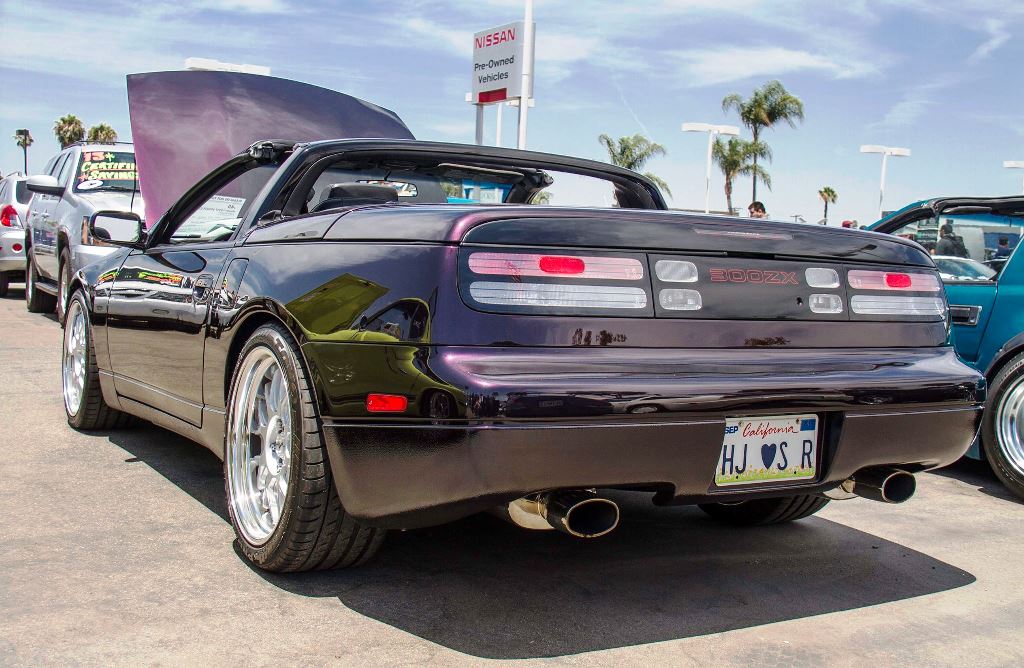
Photos do no justice to the beauty that is this Z32. This Z has had a “restoration” performed on it with twin turbo power. Every bolt has been removed, cleaned, or replaced. The odometer shows over 200K+ miles.
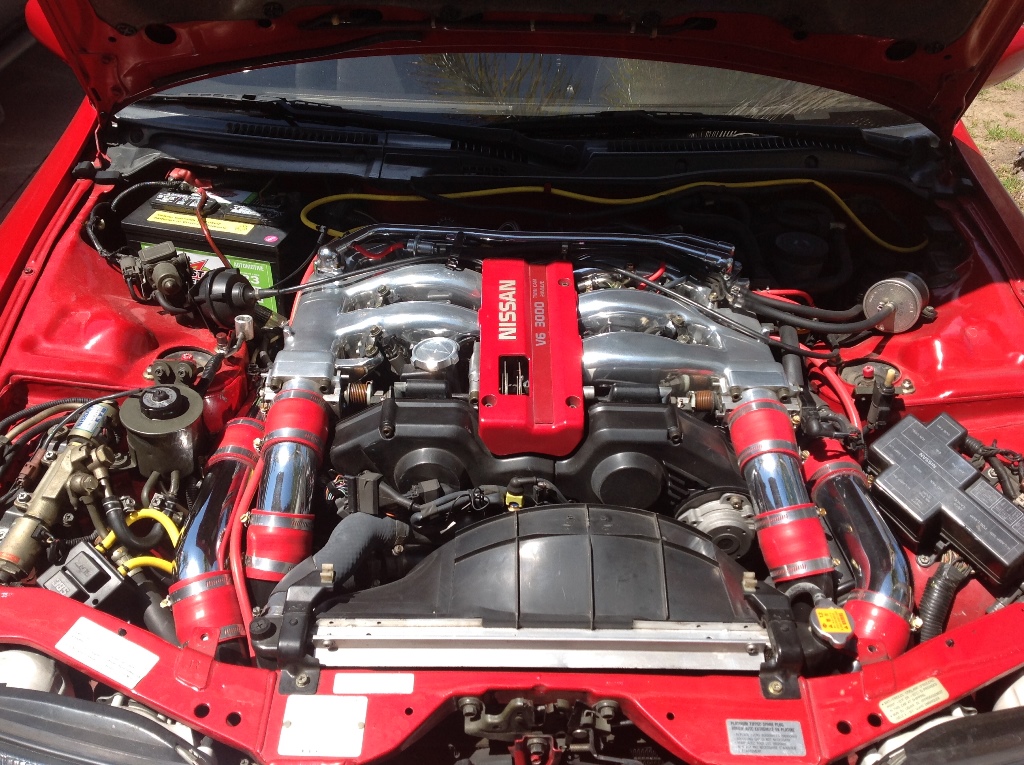
We started with a brand new Nissan long block for our engine. 300Degree and Nismo 740cc Fuel Injectors being installed.
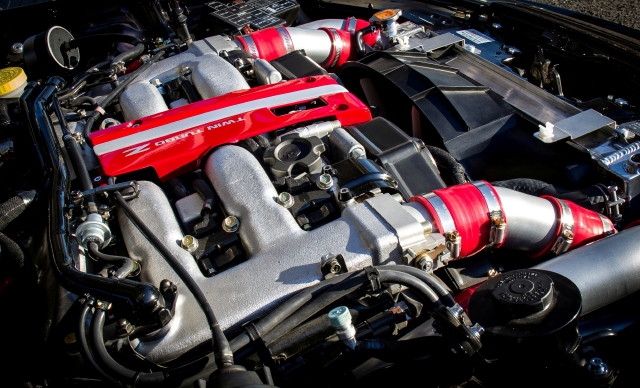
JWT Sport 700 Turbo(s) wrapped in a PTP turbo blanket. Turbo bolted to a MSP Exhaust Manifold.
ASH Inlet Piping and BDE Motor Mounts pictured above. Z1 Throttle Bodies with plenum ported to match.
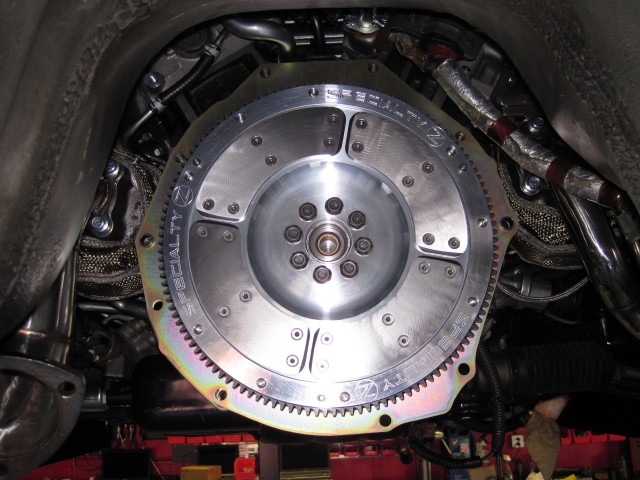
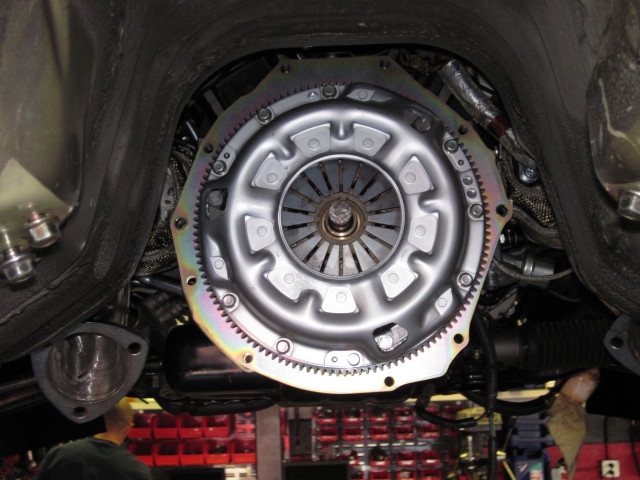
SZ Flywheel and SZ 3″ Down Pipes
SZ Max Street Clutch
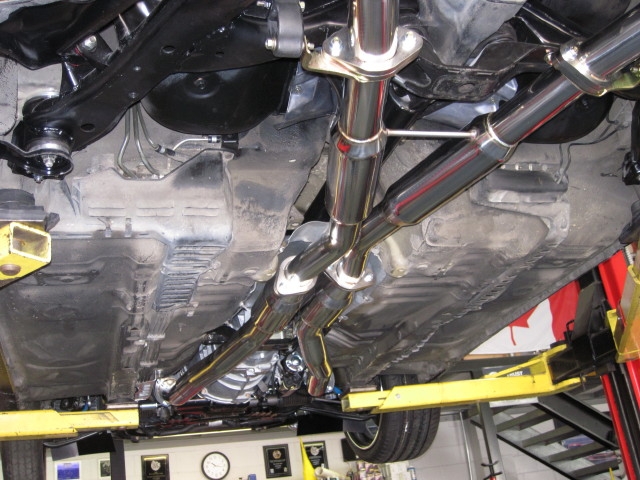
Full SZ Exhaust System. Catback is 2.5″ with a resonated x-pipe and HFC pipes.
Posted by : Sebastian Chacoff On : December 10, 2014
0
Tony came back after upgrading to 3″ intakes, Bosch 1300cc fuel injectors, Walbro 485 fuel pump (secondary), and a Fast Intentions catback. Y-pipe has been swapped out for one with high flow cats to keep smell down as well. His previous visit here.
With the addition of the new mods and tuning we were able to extract more power on 91 octane. Over 55 whp and 80 torque gains were realized.
Posted by : Sebastian Chacoff On : December 5, 2014
0
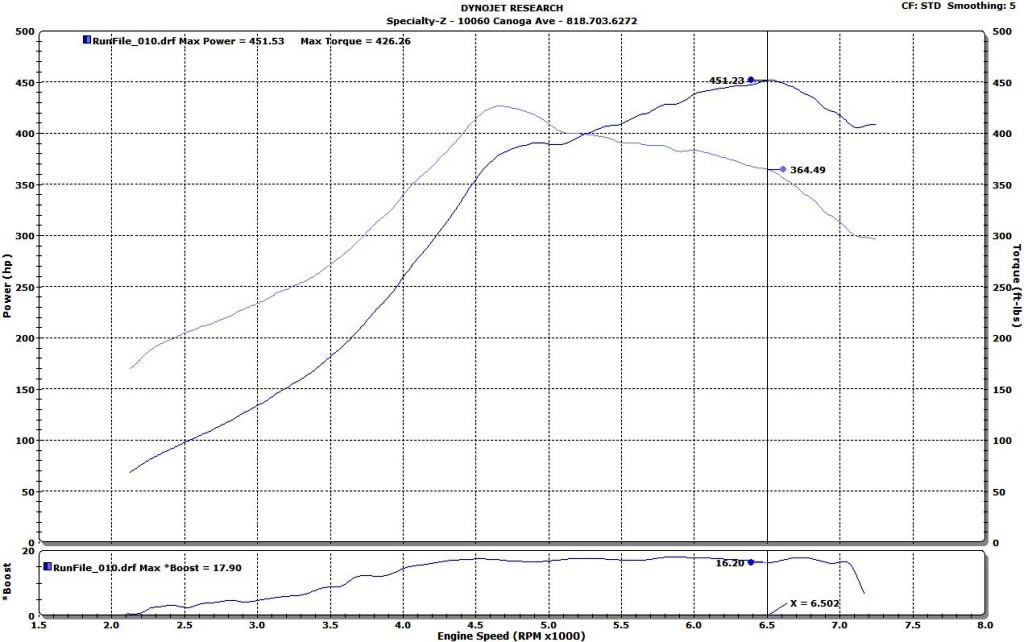
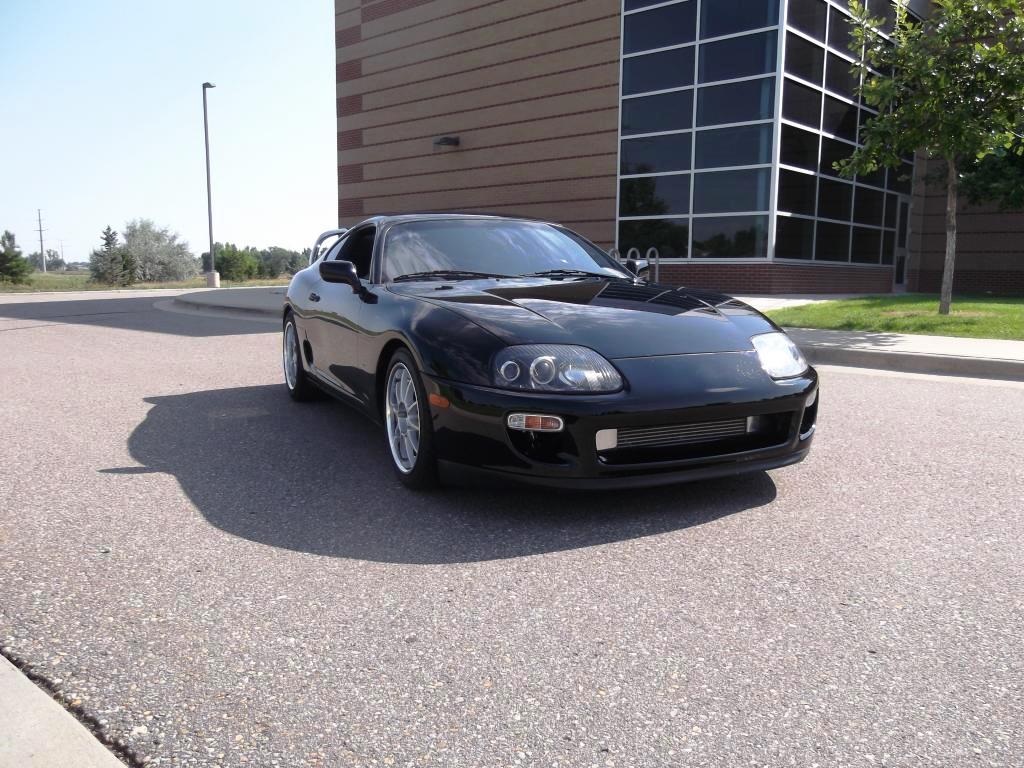
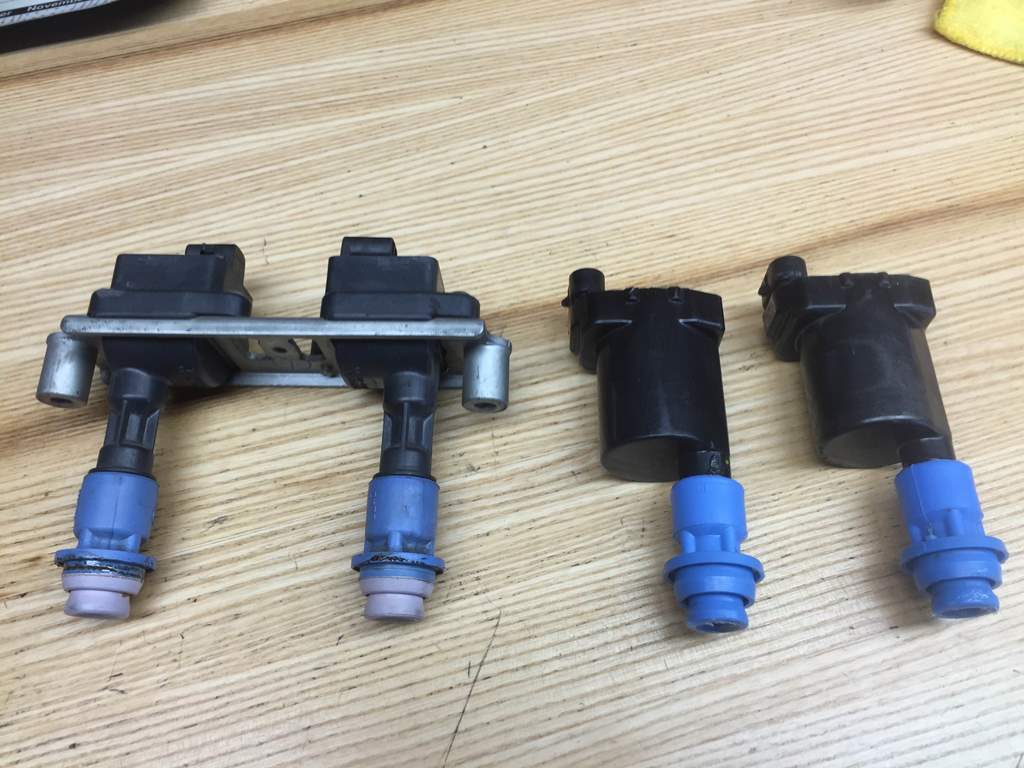
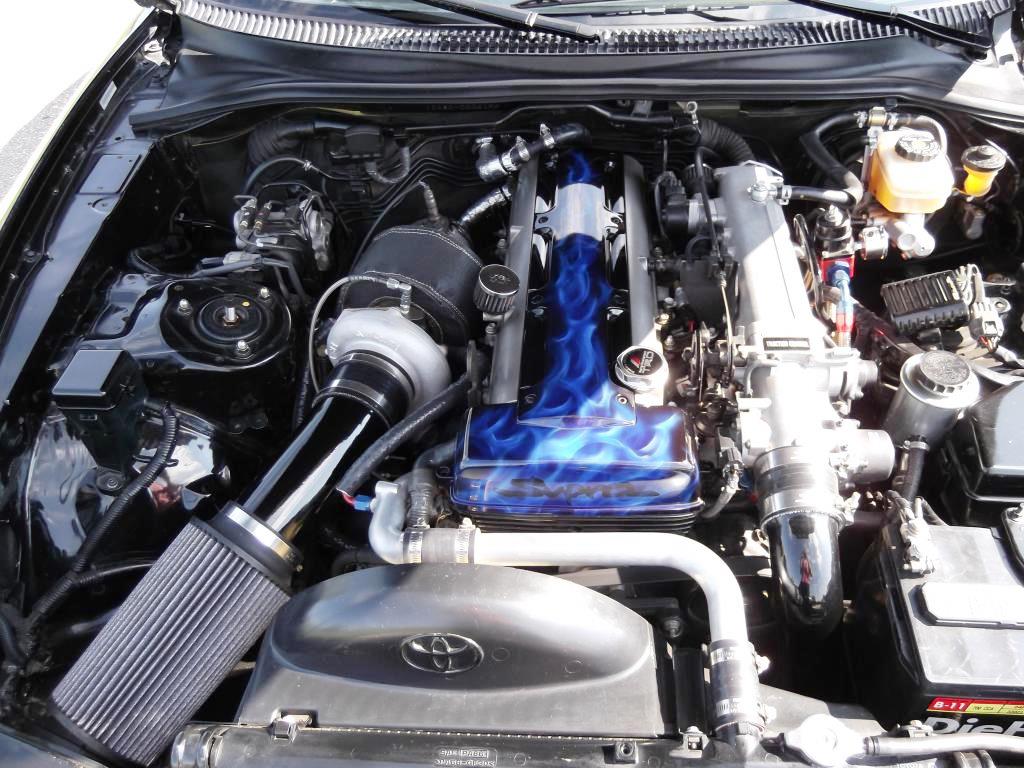
Danny stopped by the good ole’ Z shop to get help with his 1993 Toyota Supra. We first re-tuned for 91 octane and much lower elevation levels than where it originally came from. Apparently the factory Toyota ignition coils are known to be problematic. We replaced the factory coils with GM LQ9 coils that also allowed us to remove the factory igniter, that’s PTU for the Nissan crowd.
The factory ignition coils on the left and the LQ9s on the right. While we were at it the plugs were replaced with iridium units gapped down further than how they come from NGK.
The LQ9s installed, a nice look to them since they have their own heatshinks.
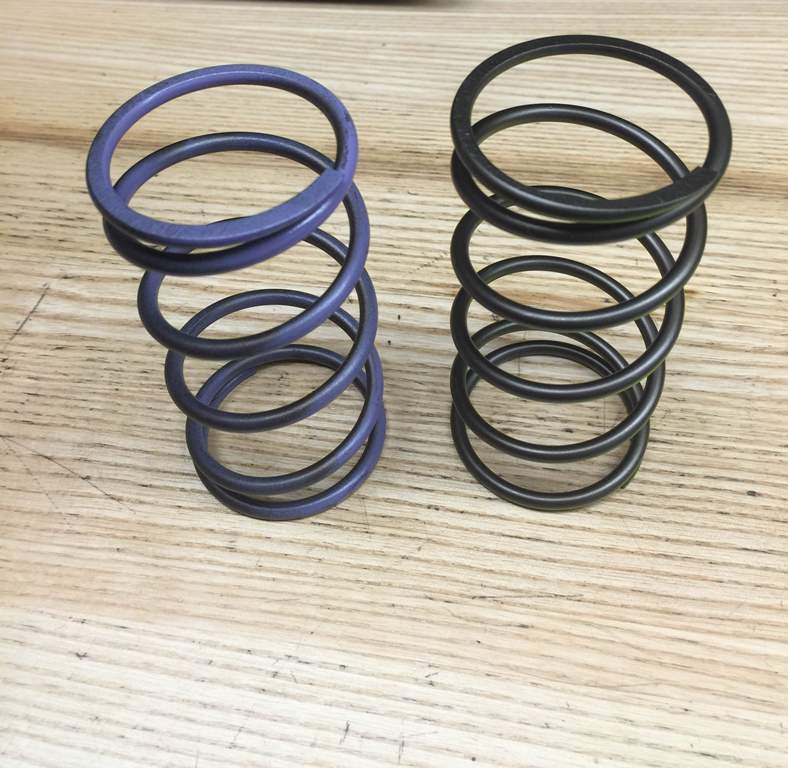
The “original” wastegate spring was replaced in favor of a lighter version, all in hopes to keep from over-boosting on 91 octane. We went from a 15-16 psi (left) spring down to a 10-12 psi (right). Although this helped a little, more needs to be done to correct the issue.
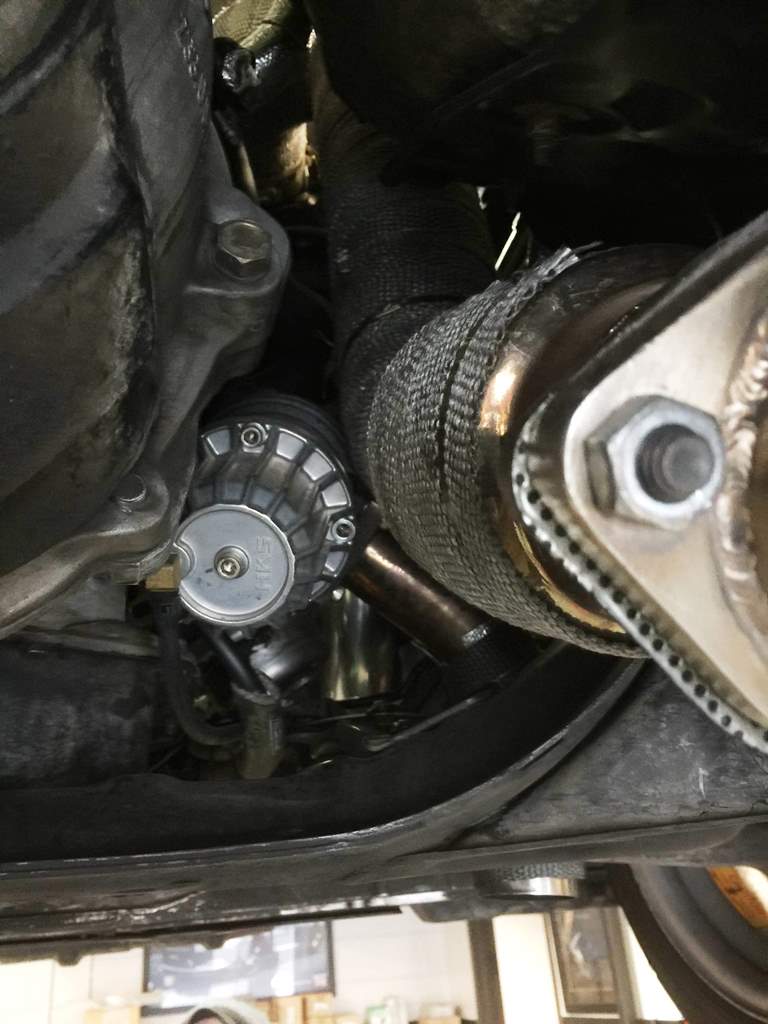
Even though this HKS wastegate looks large, its just about out of control-ability for this engine\turbo. Ideally the exhaust manifold should have two wastegate provisions (one for each of the 3 cylinders) to keep boost under better control. There are plans already in place to do this at a later date.
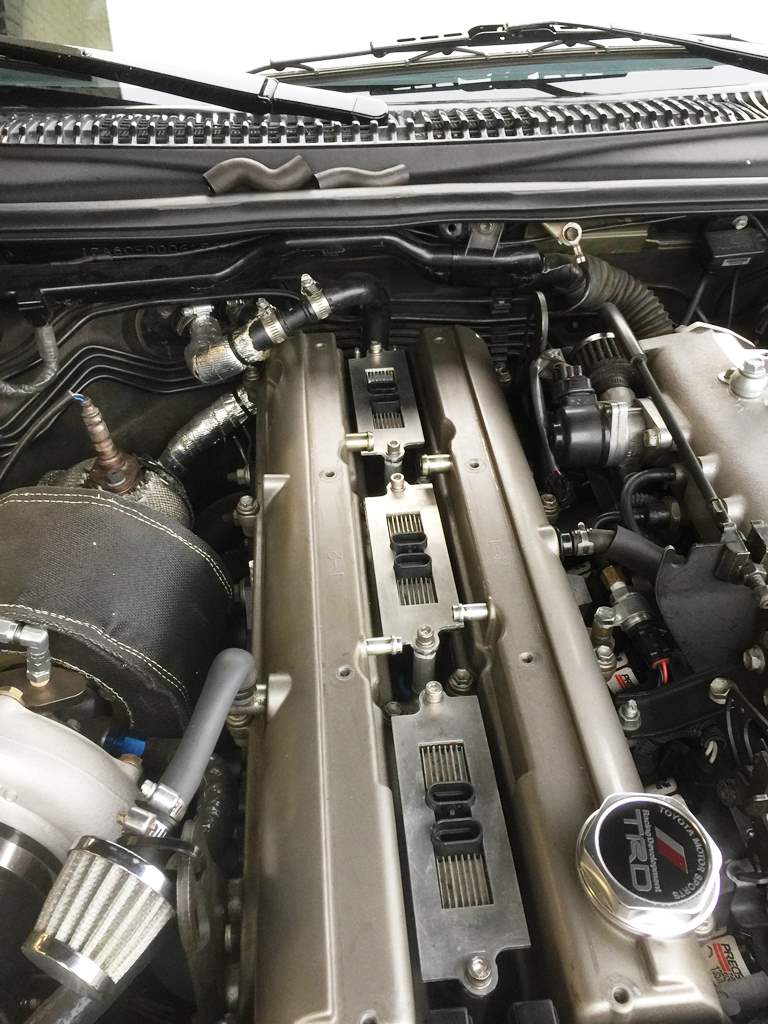
Stock longblock with a 67mm turbo and supporting modifications. The car is currently running an AEM EMS V1, this will also be replaced with a Haltech ECU and injectors will be replaced with newer Bosch units. Flex Fuel ready!
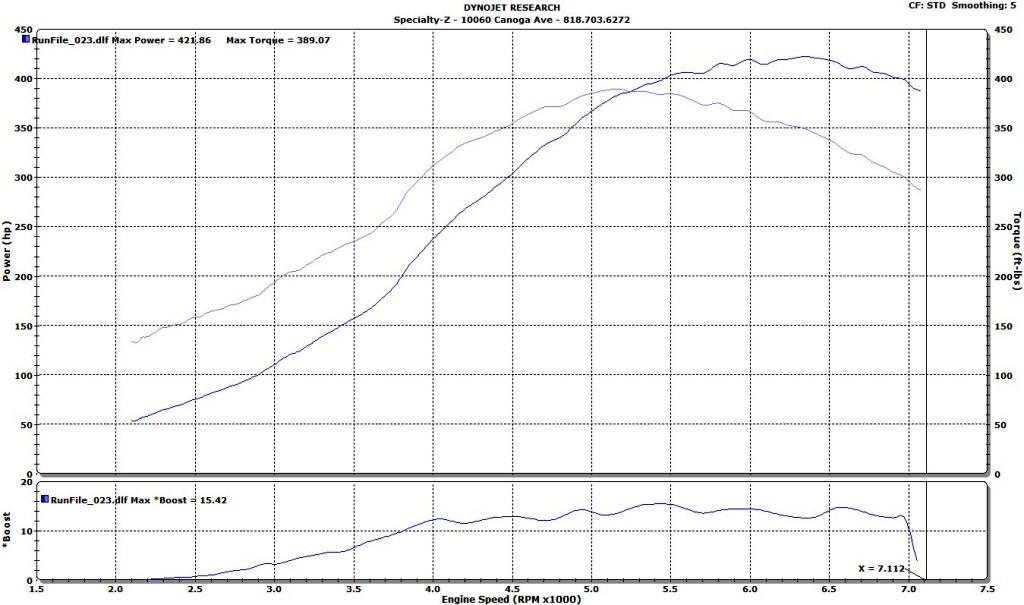
We kept the boost as low as we could for 91 octane and 4th gear dyno pulls (15 psi).